Adding nRF board to OpenThread#
Integrate your Nordic nRF52840 DK board to an active OpenThread Border Router.
Prerequisites#
- An active OpenThread Border Router.
- The nRF52840 DK board with a USB cable.
- Installed minicom or RealTerm (for Linux or Mac) or PuTTy (for Windows) or other serial communication program.
- Installed nrfjprog from Nordic Semiconductor page.
- A user with access to the Coiote IoT Device Management platform platform and appropriate permissions.
Connecting to the OpenThread#
Note
Check your active Border Router IP address on which your Border Router works (e.g. 192.168.10.3) and save it - use your address instead of <OTBR_IP_address> in the next steps.
Connecting to the WebUI#
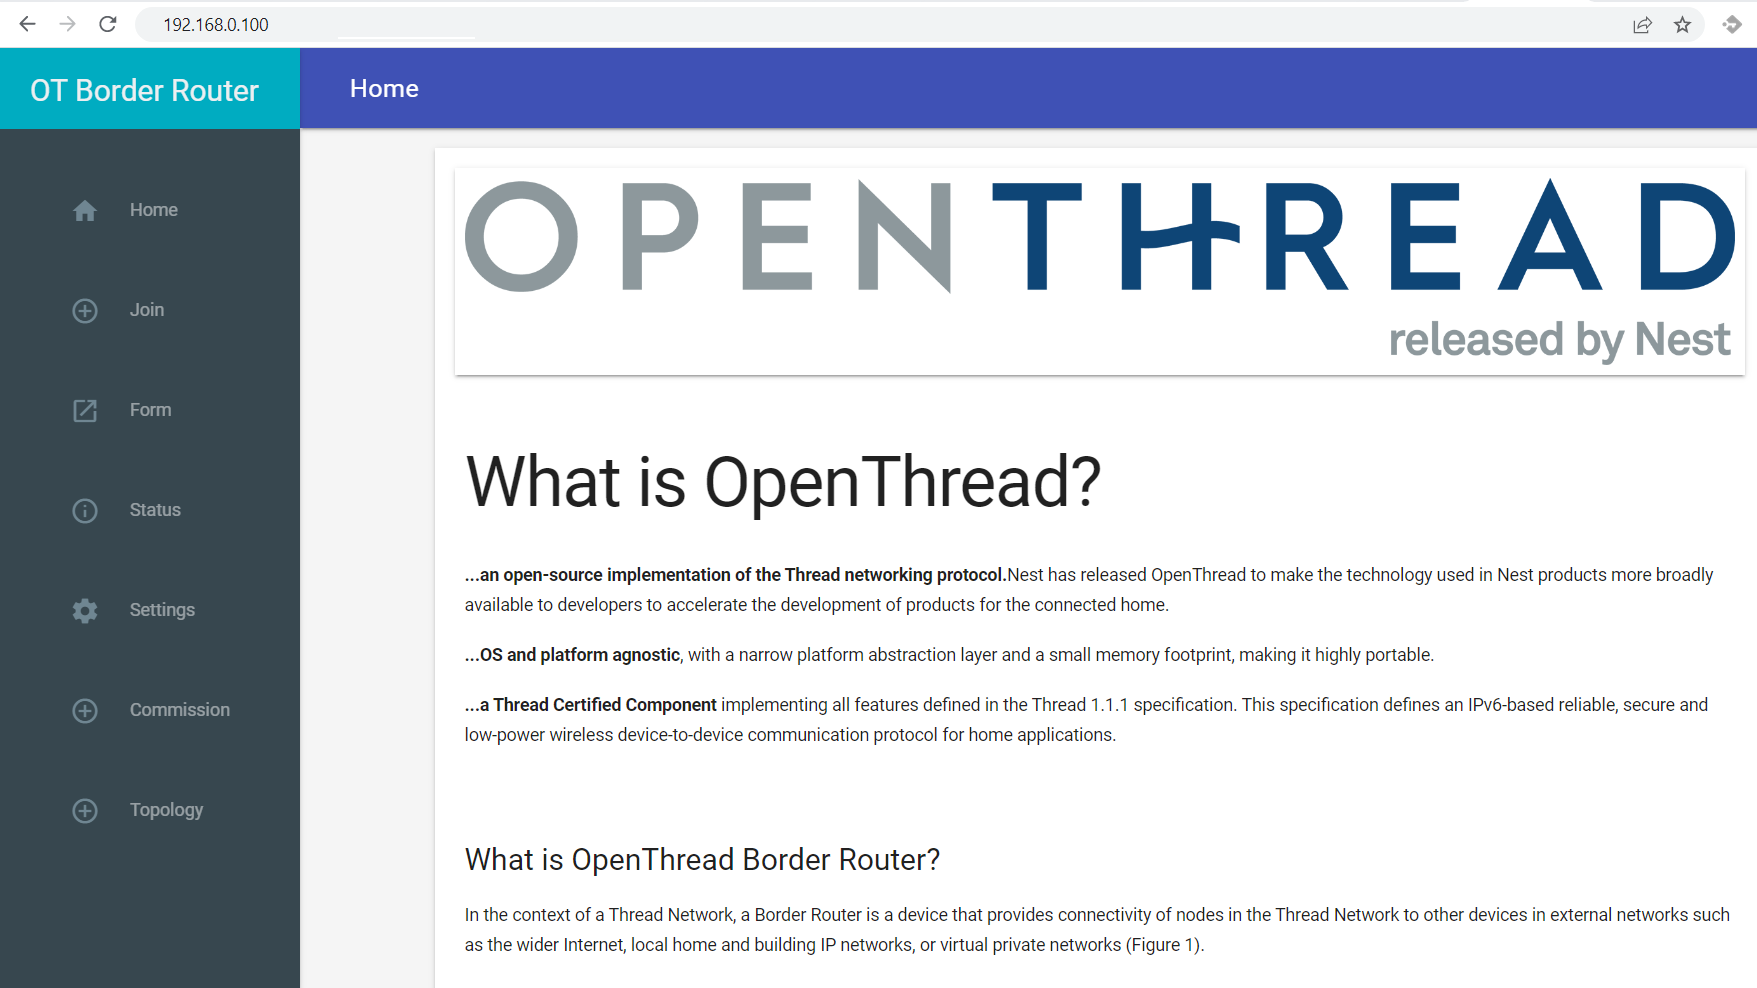
You should be in the same network as your OpenThread Border Router. To configure the Border Router open any web browser and connect to the WebUI by typing <OTBR_IP_address>:80.
When you are connected you should see the OpenThread main page:
Creating an OpenThread network#
On the left side, select the Form option, and a new page will be displayed for the network creation. After providing required credentials, click the FORM button and a message should pop up to let you know about the operation's success. 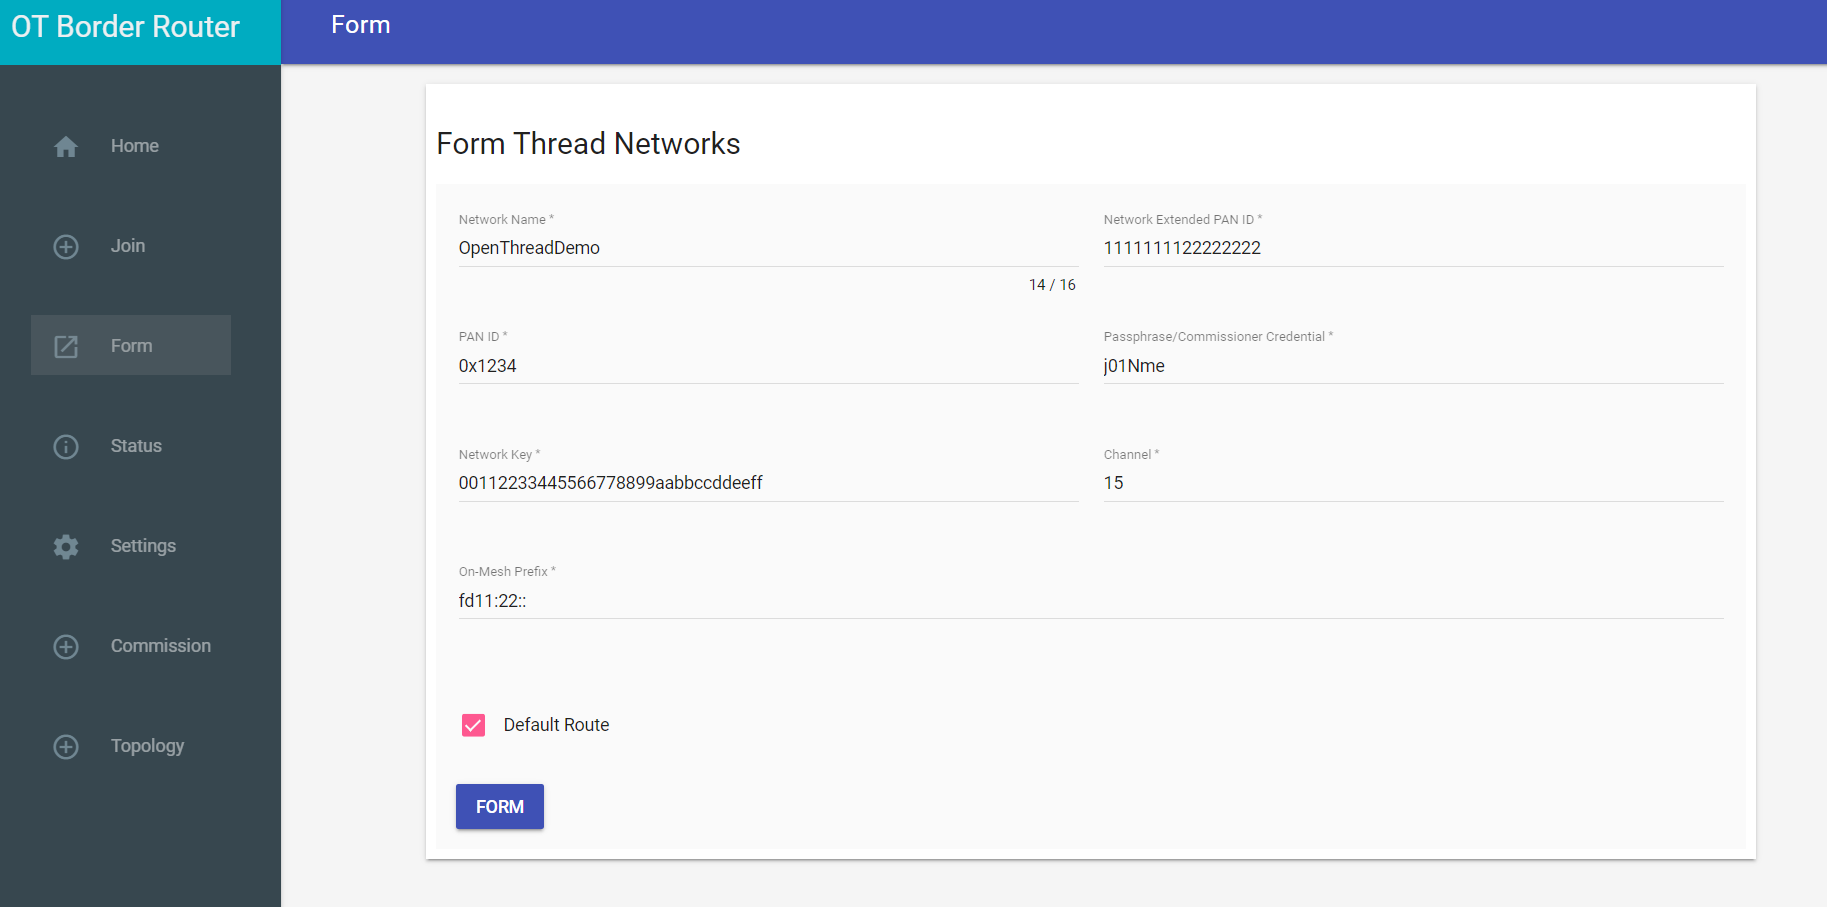
On the left-side menu, click Topology to see the role of Border Router. 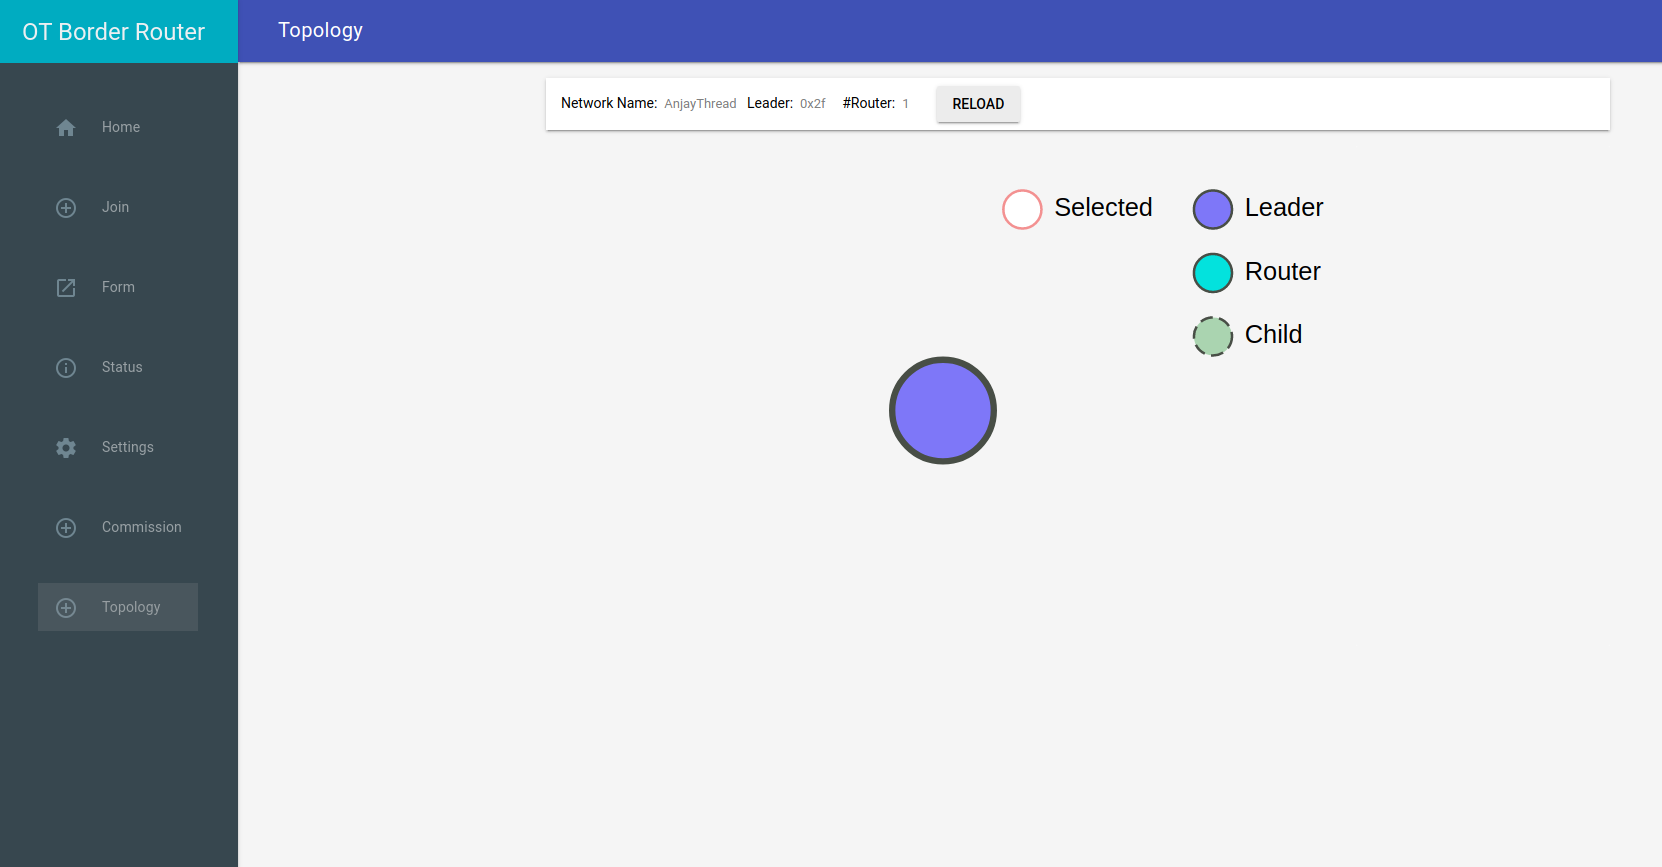
Commissioning process#
To start the commissioning process click Commission on the left-side menu and write down Joiner PSKd password.
Important
The PSKd needs following:
-
length: 6-32 characters,
-
encoding: base32-thread (0-9, A-Y excluding I, O, Q, and Z for readability).
Remember the Joiner PSKd password, you will use it in the next step to configure your device.
For more information check here.
Click START COMMISSION button, and a message should pop up to inform you about the operation's success. 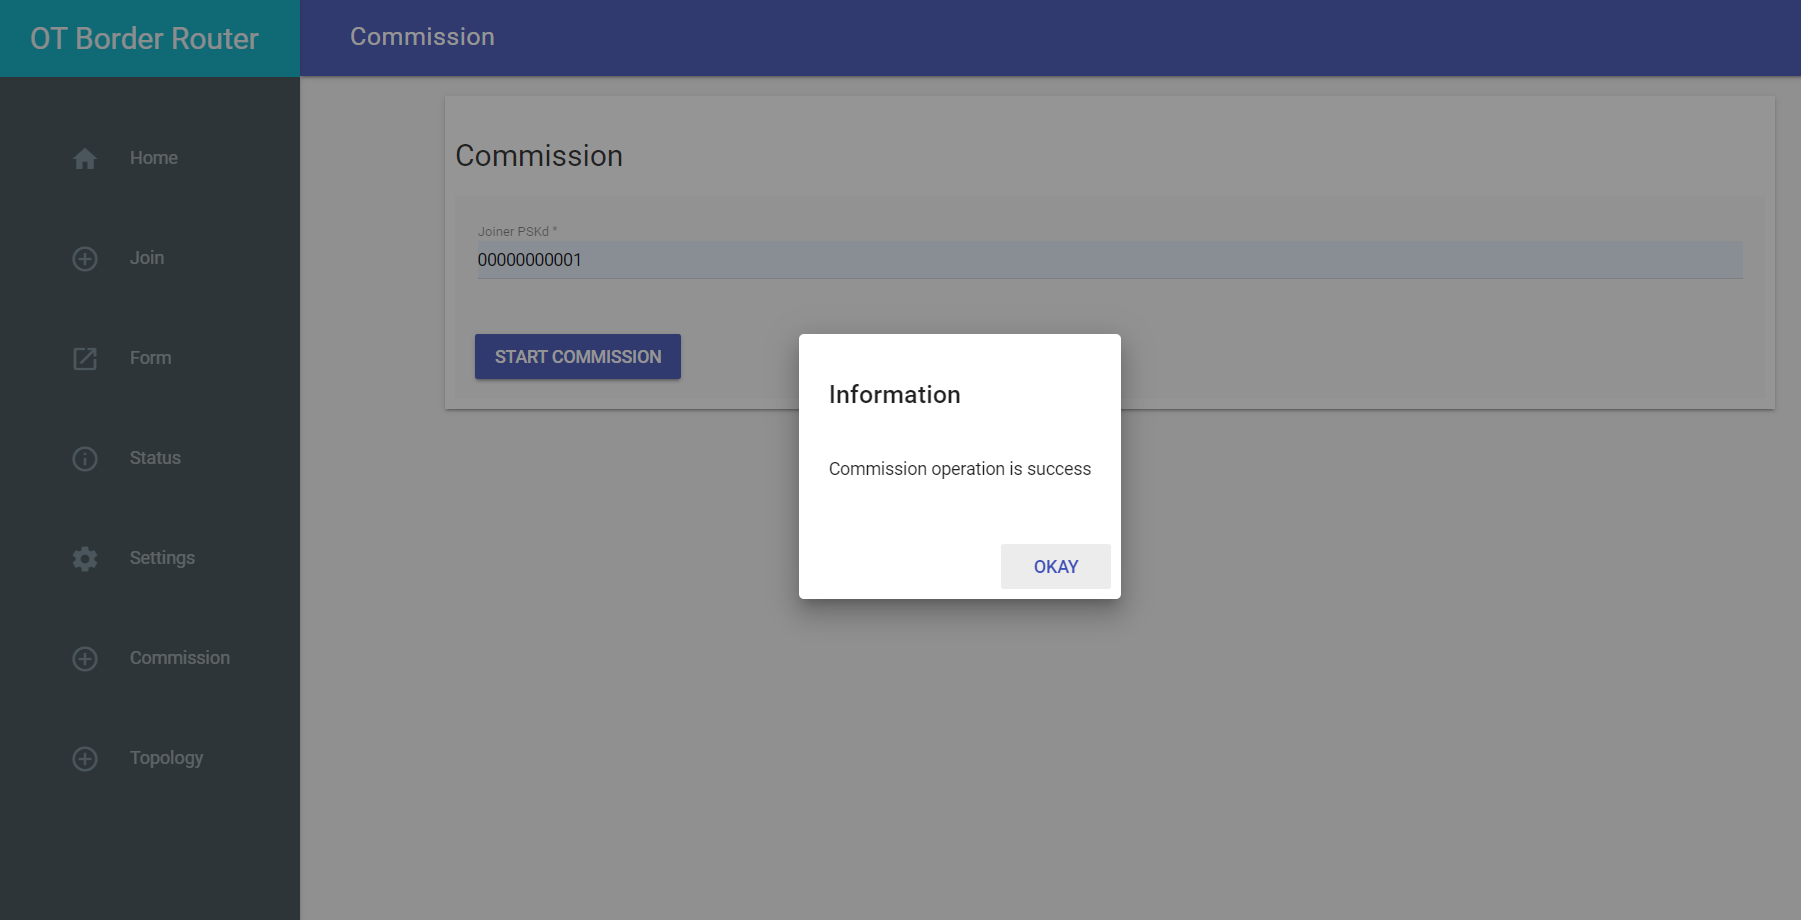
Device configuration#
-
Get Zephyr, SDK and other dependencies, as described in Zephyr's Getting Started Guide (first 4 steps).
-
After navigating to Zephyr workspace (~/zephyrproject is default after following Getting Started Guide), clone Anjay Zephyr client repository.
git clone https://github.com/AVSystem/Anjay-zephyr-client -
Connect the nRF52840 board to the USB port of your machine.
-
Because NCS uses a west-nrf.yml file, it is necessary to change our Zephyr workspace, it is handled by using a different manifest file. Set West manifest path to Anjay-zephyr-client/demo, and manifest file to west-nrf.yml and do west update.
west config manifest.path Anjay-zephyr-client/demo west config manifest.file west-nrf.yml west update -
Go to Anjay-zephyr-client/demo/boards directory and find the
nrf52840dk_nrf52840.conffile. In this file, you will need to change the joiner PSKd password (theCONFIG_OPENTHREAD_JOINER_PSKDoption):# OpenThread CONFIG_OPENTHREAD_JOINER=y CONFIG_OPENTHREAD_JOINER_AUTOSTART=y CONFIG_OPENTHREAD_MANUAL_START=y CONFIG_OPENTHREAD_SLAAC=y CONFIG_OPENTHREAD_JOINER_PSKD="00000000001" CONFIG_OPENTHREAD_FTD=yNote
The last config option in the
nrf52840dk_nrf52840.conffile (CONFIG_OPENTHREAD_FTD) tells about a Full Thread Device (FTD) which always has its radio on and maintains IPv6 address mappings. This option can be changed toCONFIG_OPENTHREAD_MTD, a Minimal Thread Device (MTD) that forwards all messages to its Parent. -
Now in Anjay-zephyr-client/demo directory you can compile the project.
west build -b nrf52840dk_nrf52840 -
After successful build you can flash the target.
west flash
Connecting to the LwM2M Server#
To connect to Coiote IoT Device Management platform, please register at https://eu.iot.avsystem.cloud.
To connect the board:
- Log in to Coiote IoT DM and from the left side menu, select Device Inventory.
- In Device Inventory, click Add device.
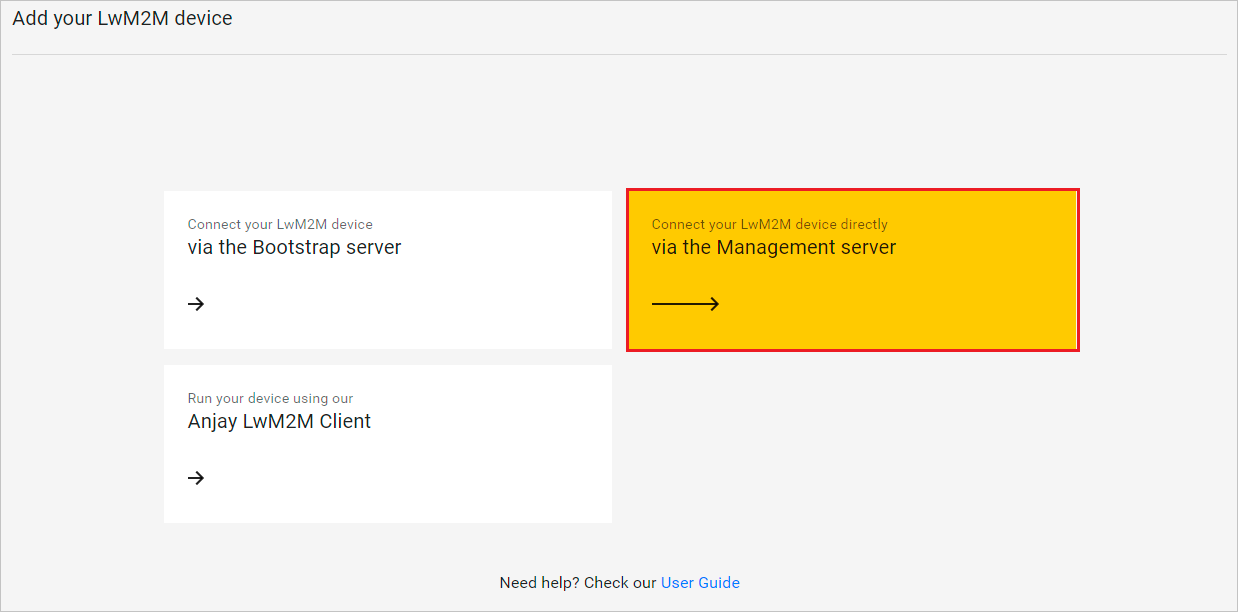
- Select the Connect your LwM2M device directly via the Management server tile.
- In the Device credentials step:
- In the Device ID enter your board endpoint name, e.g.
test_device.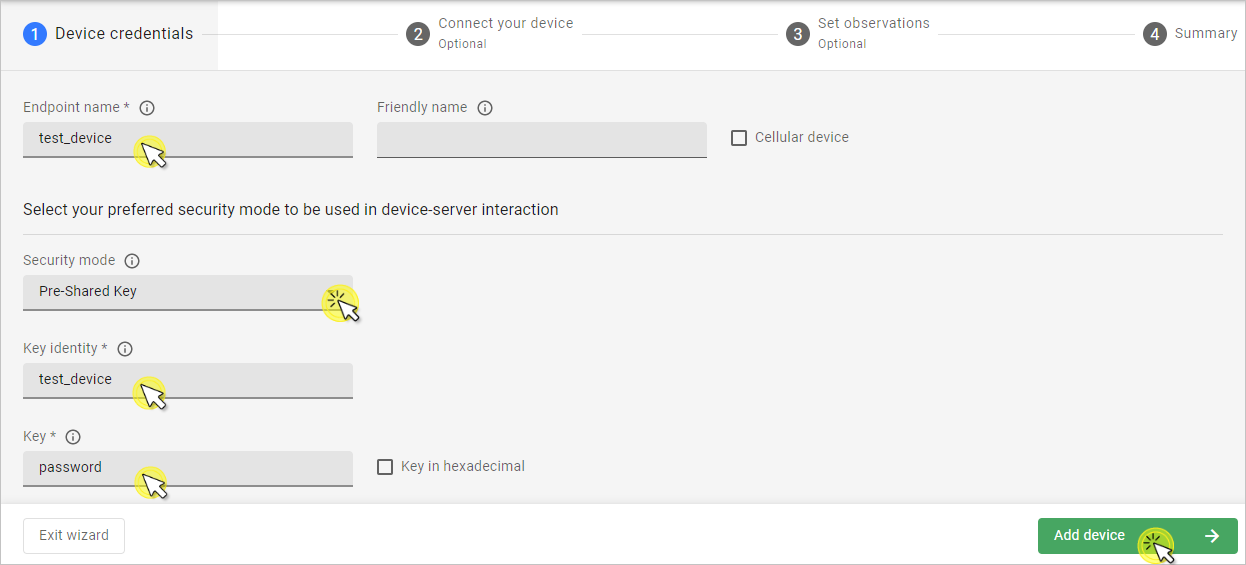
- In the Security mode section, select the PSK (Pre-Shared Key) mode:
- In the Key identity field, type the same name as in the
Endpoint namefield. - In the Key field, type the shared secret used in the device-server authentication.
- In the Key identity field, type the same name as in the
- In the Device ID enter your board endpoint name, e.g.
- Click the Add device button and Confirm in the confirmation pop-up.
- In the Connect your device step, follow the next section to run the client and connect it to the server.
- In the Device credentials step:
Configuring the Client#
- With the board still connected to a serial port interface, open a serial communication program.
-
Use the
anjaycommand to list possible options:uart:~$ anjay anjay - Anjay commands Subcommands: start :Save config and start Anjay stop :Stop Anjay config :Configure Anjay paramsTip
To show available subcommands, use the Tab key.
-
Use the
anjay stopcommand to stop LwM2M Client and change credentials. -
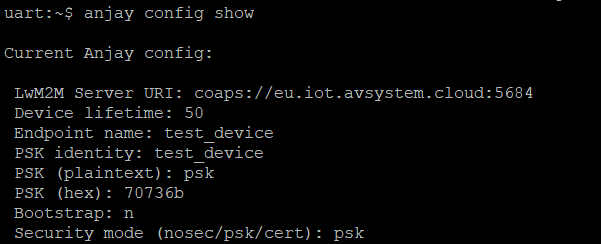
Check your default credentials by following the instructions in the program:
Note
If your default credentials are different from device credentials provided in Coiote IoT DM, change them using the
anjay config set <possible_option> <value>command.
-
Use the
anjay startcommand to run the Client. -
In logs, you can find information about status of the device. There will be information about success or failure in joining the connection and the current role of your device in the OpenThread network.
-
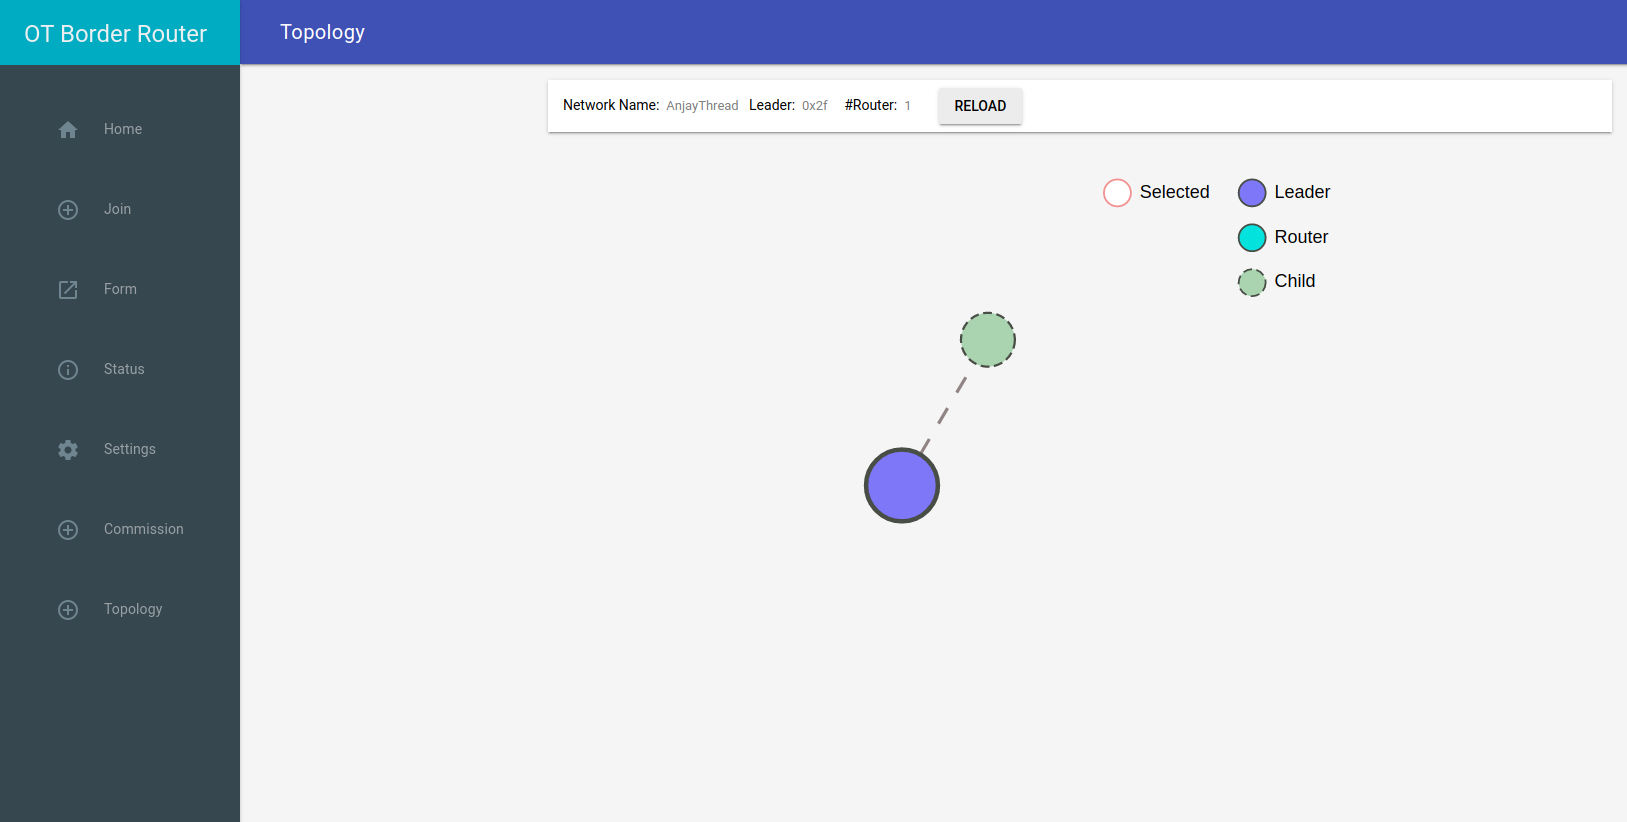
Go to OpenThread main web page, on the left-side menu click Topology to see connected device.
Note
The node should join the OTBR Thread network automatically. Within two minutes its state should change to
router.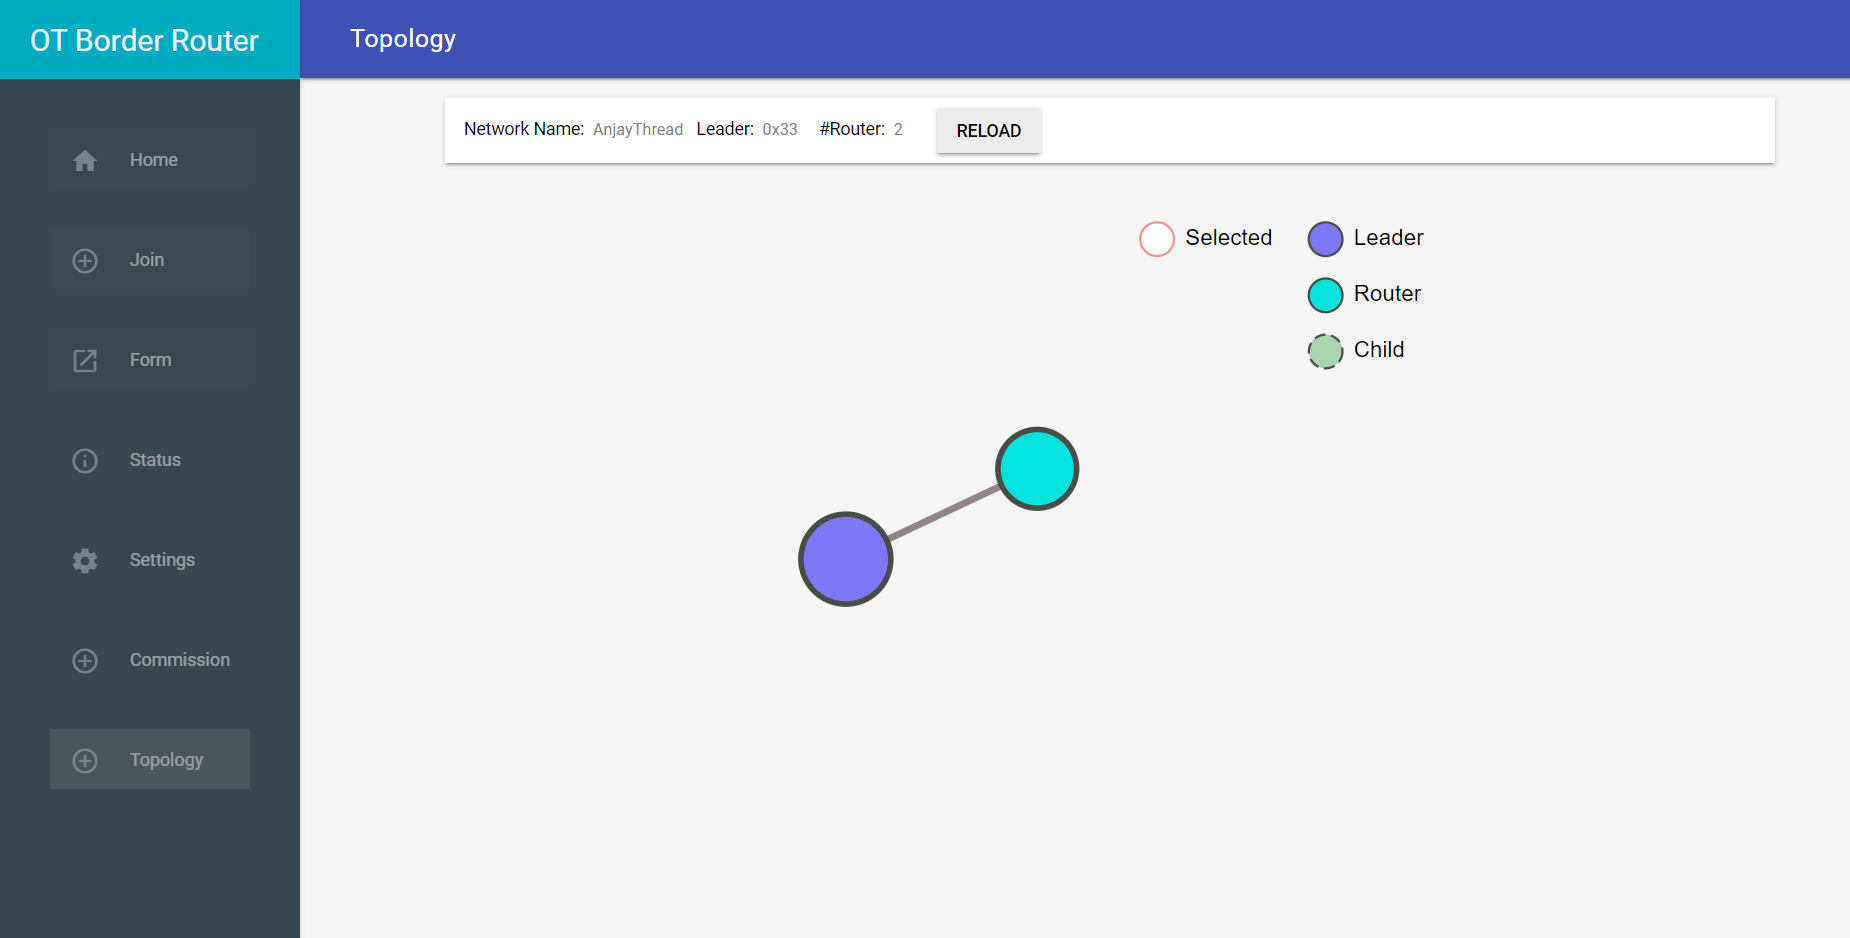
-
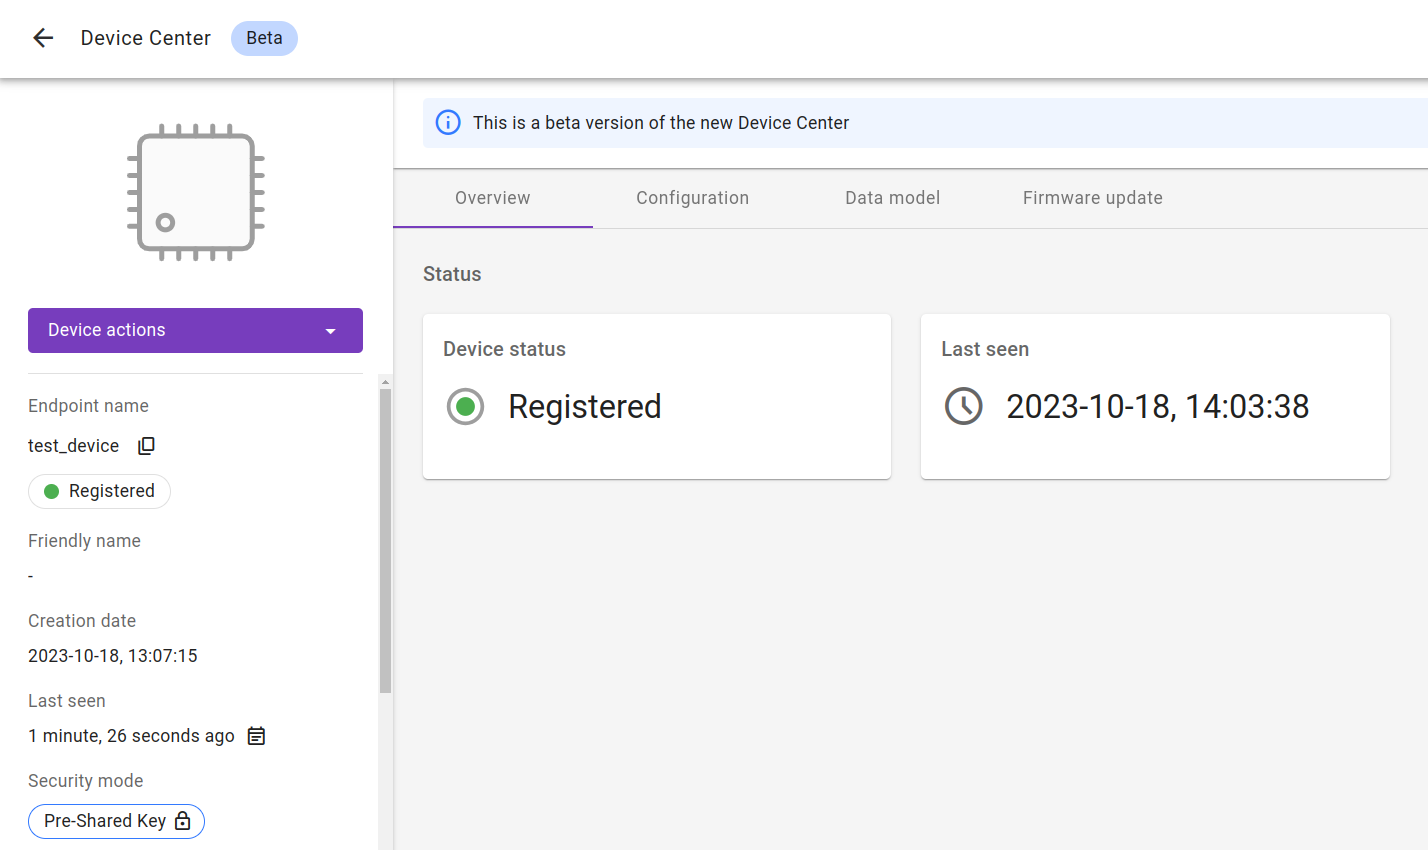
Go to Coiote IoT DM to check if your device is connected. Click Next, then Go to Summary, then Finish. You will see your Device Center view:
Note
When Anjay has no connection with the server or network for a long time, warning
at_monitor: No heap space for incoming notification: <notification> may appear.
It does not affect the operation of the application and will no longer appear after reconnection.
