B-U585I-IOT02A/BG96#
Integrate your B-U585I-IOT02A Discovery kit board along with the default-provided Quectel BG96 modem.
Prerequisites#
- The STM32U585I-IOT02A/BG96 board with a Micro-USB cable.
- The serial communication program, such as minicom (for Linux) or RealTerm or PuTTY (for Windows) installed.
- A user with access to the Coiote IoT Device Management platform.
- Optional: installed STM32CubeIDE.
Prepare Anjay client application#
Use an already built binary#
To get the latest binary file and flash it to the board:
- Go to Anjay-freertos-client.
- Download the
Anjay-freertos-client-B-U585I-IOT02A-BG96.binfile. - To flash the board, open your File manager and drag the downloaded
.binfile to your DIS_U585AI external device. - You will see a blinking diode on your board. The diode stops blinking as soon as the flashing is finished.
Start development using samples#
Note
This step is optional. If you've gone through the Use an already built binary step, you can jump to Connect to the LwM2M Server.
Clone the Anjay freeRTOS client repository#
Enter the command line interface on your machine and run the following command:
git clone --recursive https://github.com/AVSystem/Anjay-freertos-client
Build binary and flash the board#
- Connect the STM32U585I-IOT02A board to a USB port of your machine.
- Go to the STM32CubeIDE.
- Import the project cloned in the previous step to your workspace:
- From the navigation bar, select File and click Import.
- From the General list, select Existing Projects into Workspace and click Next.
- In Select root directory, indicate the catalog containing the cloned Anjay freeRTOS client repository.
- In the Projects field, select Anjay-freertos-client-B-U585I-IOT02A-BG96 and click Finish.

- In the Project Explorer, navigate to the Anjay-freertos-client-B-U585I-IOT02A-BG96 project:
- Choose "Debug" configuration and build the project by right-clicking on the project name and selecting Build Project. The build should take less than one minute to complete.
- After the build is finished, right-click on the project name, select Run As and click the 1 STM32 Cortex-M C/C++ Application option.
- In the Launch Configuration Selection, choose the Anjay-freertos-client-B-U585I-IOT02A-BG96 option and click OK.
- After the build and run are complete, the board is flashed with compiled binary.
Connect to the LwM2M Server#
To connect to Coiote IoT Device Management platform, please register here.
Note
If you use BG96-based configuration, you must upgrade the firmware of the modem to at least the BG96MAR02A08M1G revision. Older versions may cause unexpected loss of connection.
To upgrade this firmware please download the folowing .zip files:
- Pack_BG96MAR02A08M1G_01.012.01.012,
- Quectel_LTE_Windows_USB_Driver_V2.0,
- QFlash_V4.10.
In Pack_BG96MAR02A08M1G_01.012.01.012 you will find step-by-step instruction. Step 2 and step 4 in this instruction doesn't work. For that reason you will need to download Quectel_LTE_Windows_USB_Driver_V2.0 file, as a required file for step 2, and QFlash_V4.10 file, as a required file for step 4.
To connect the board, log in to the platform and follow onboarding guide.
Configure the Client#
- With the board still connected to a serial port interface, open your serial communication program.
-
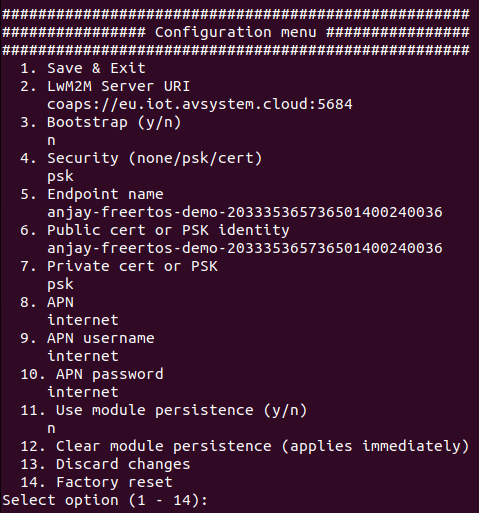
Press the reset button located on the board. This should trigger the following prompt:
Press any key in 3 seconds to enter config menu... -
Press any key, and in the configuration menu, change the default credentials to your data by following the instructions presented in the program, then save it.
Tip
LwM2M Server URI, endpoint name and other information you can be found in the configuration tab.

Important
APN (Access Point Name) is the name of a gateway between a GSM, GPRS, 3G and 4G mobile network and another computer network. If you use a built-in Truphone eSIM card, change the APN to iot.truphone.com.
Note
If you use an external SIM card, you need to verify the APN used by your SIM card provider.
-
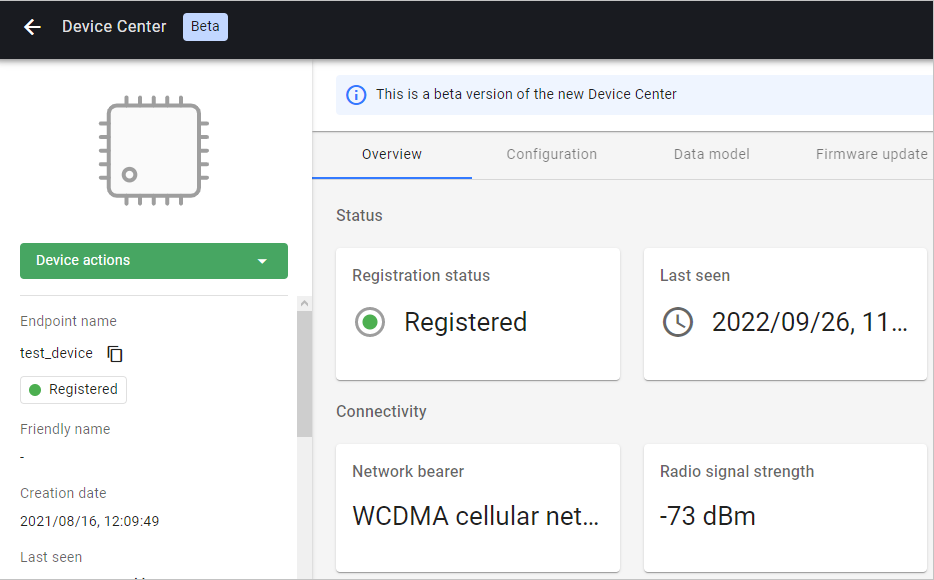
Go to Coiote IoT DM to check if your device is connected. Click Next, then Go to Summary, then Finish. You will see your Device Center view:

Next steps#
If you want to develop your own LwM2M-enabled application based on STM32 B-U585I-IOT02A, check Anjay-freertos-client and start prototyping!