Quick Start#
Welcome to the DevZone of AVSystem!#
This Quick Start walks you through the process of building your first LwM2M application using AVSystem’s LwM2M Client Anjay and AVSystem’s LwM2M Server Coiote IoT Device Management platform.
Follow this guide to build your first LwM2M application using a simulated device within 20 minutes.
Access the Coiote IoT DM portal#
Get started by signing up to Coiote IoT Device Management platform. You can sign up for a developer account, which allows you to connect up to 10 devices free of charge.

Run Anjay LwM2M Client Demo#
Anjay LwM2M SDK is a set of tools that enables device vendors and IoT developers to easily implement a LwM2M client on their hardware. It is available both in an advanced commercial version and in the open-source model, you can find it on GitHub.
Start by running the Anjay client on your Linux, Mac or Windows machine and simulate LwM2M telemetry data. Try Anjay demo client to onboard your first simulated device.
Note
If preferred, you can directly jump to the Getting Started guides of the popular hardware platforms:
Info
For more information about the Anjay LwM2M Client, visit the Anjay Library Documentation.
Add a new device in Coiote IoT DM#
After compiling the demo project, go back to the Coiote IoT DM portal.
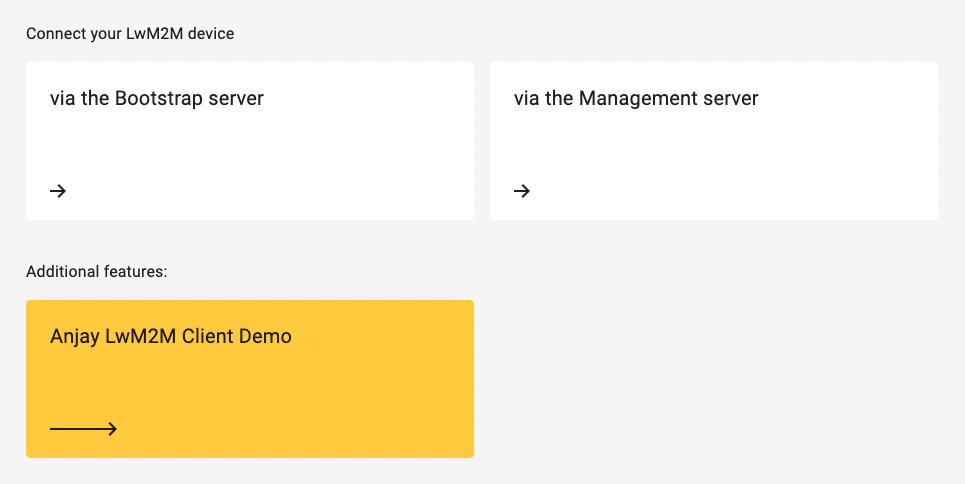
Click + Add device in the top-right corner.

Add a new device using the option: Anjay LwM2M Client Demo
Copy the command you find in Coiote IoT DM.
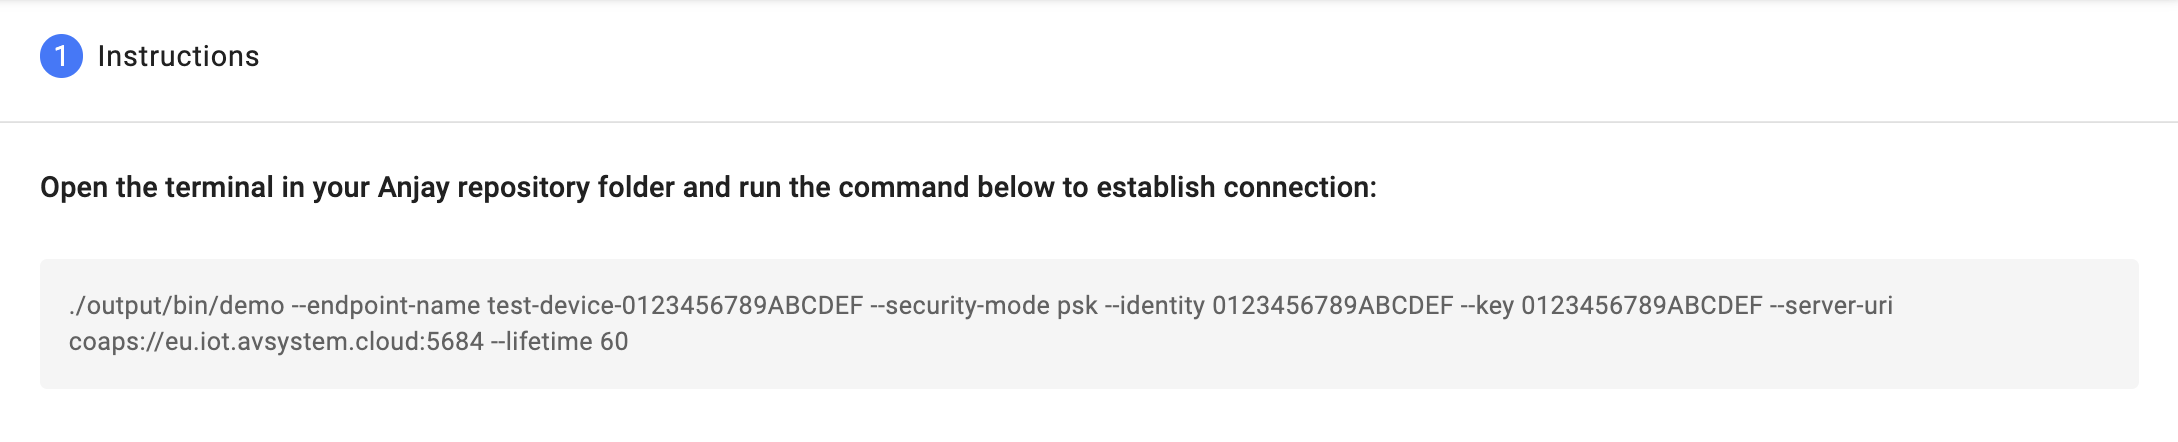
Go back to your terminal, open your Anjay directory and run the command to configure and activate the demo application.
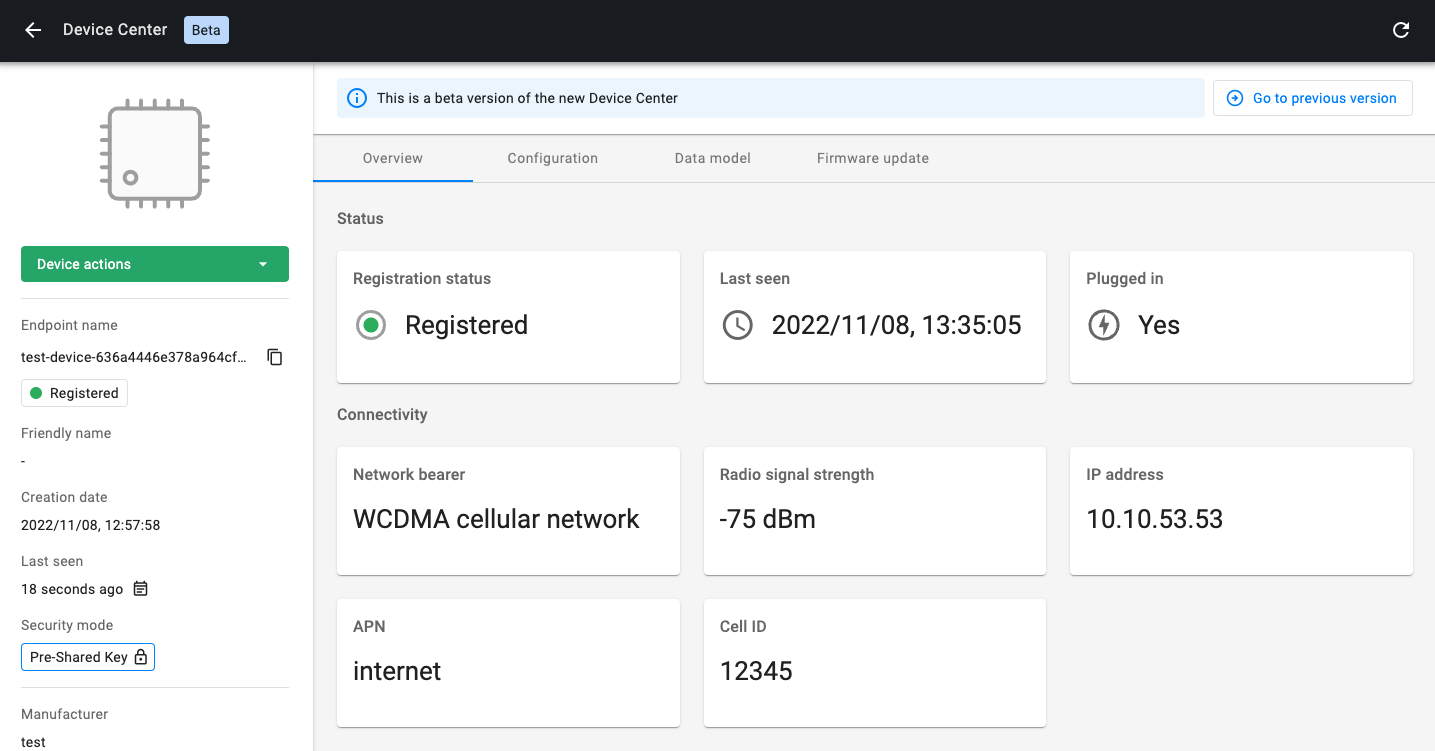
Monitor your demo device in the Coiote IoT DM#
If the demo application started successfully, a device is shown in theCoiote IoT DMplatform.
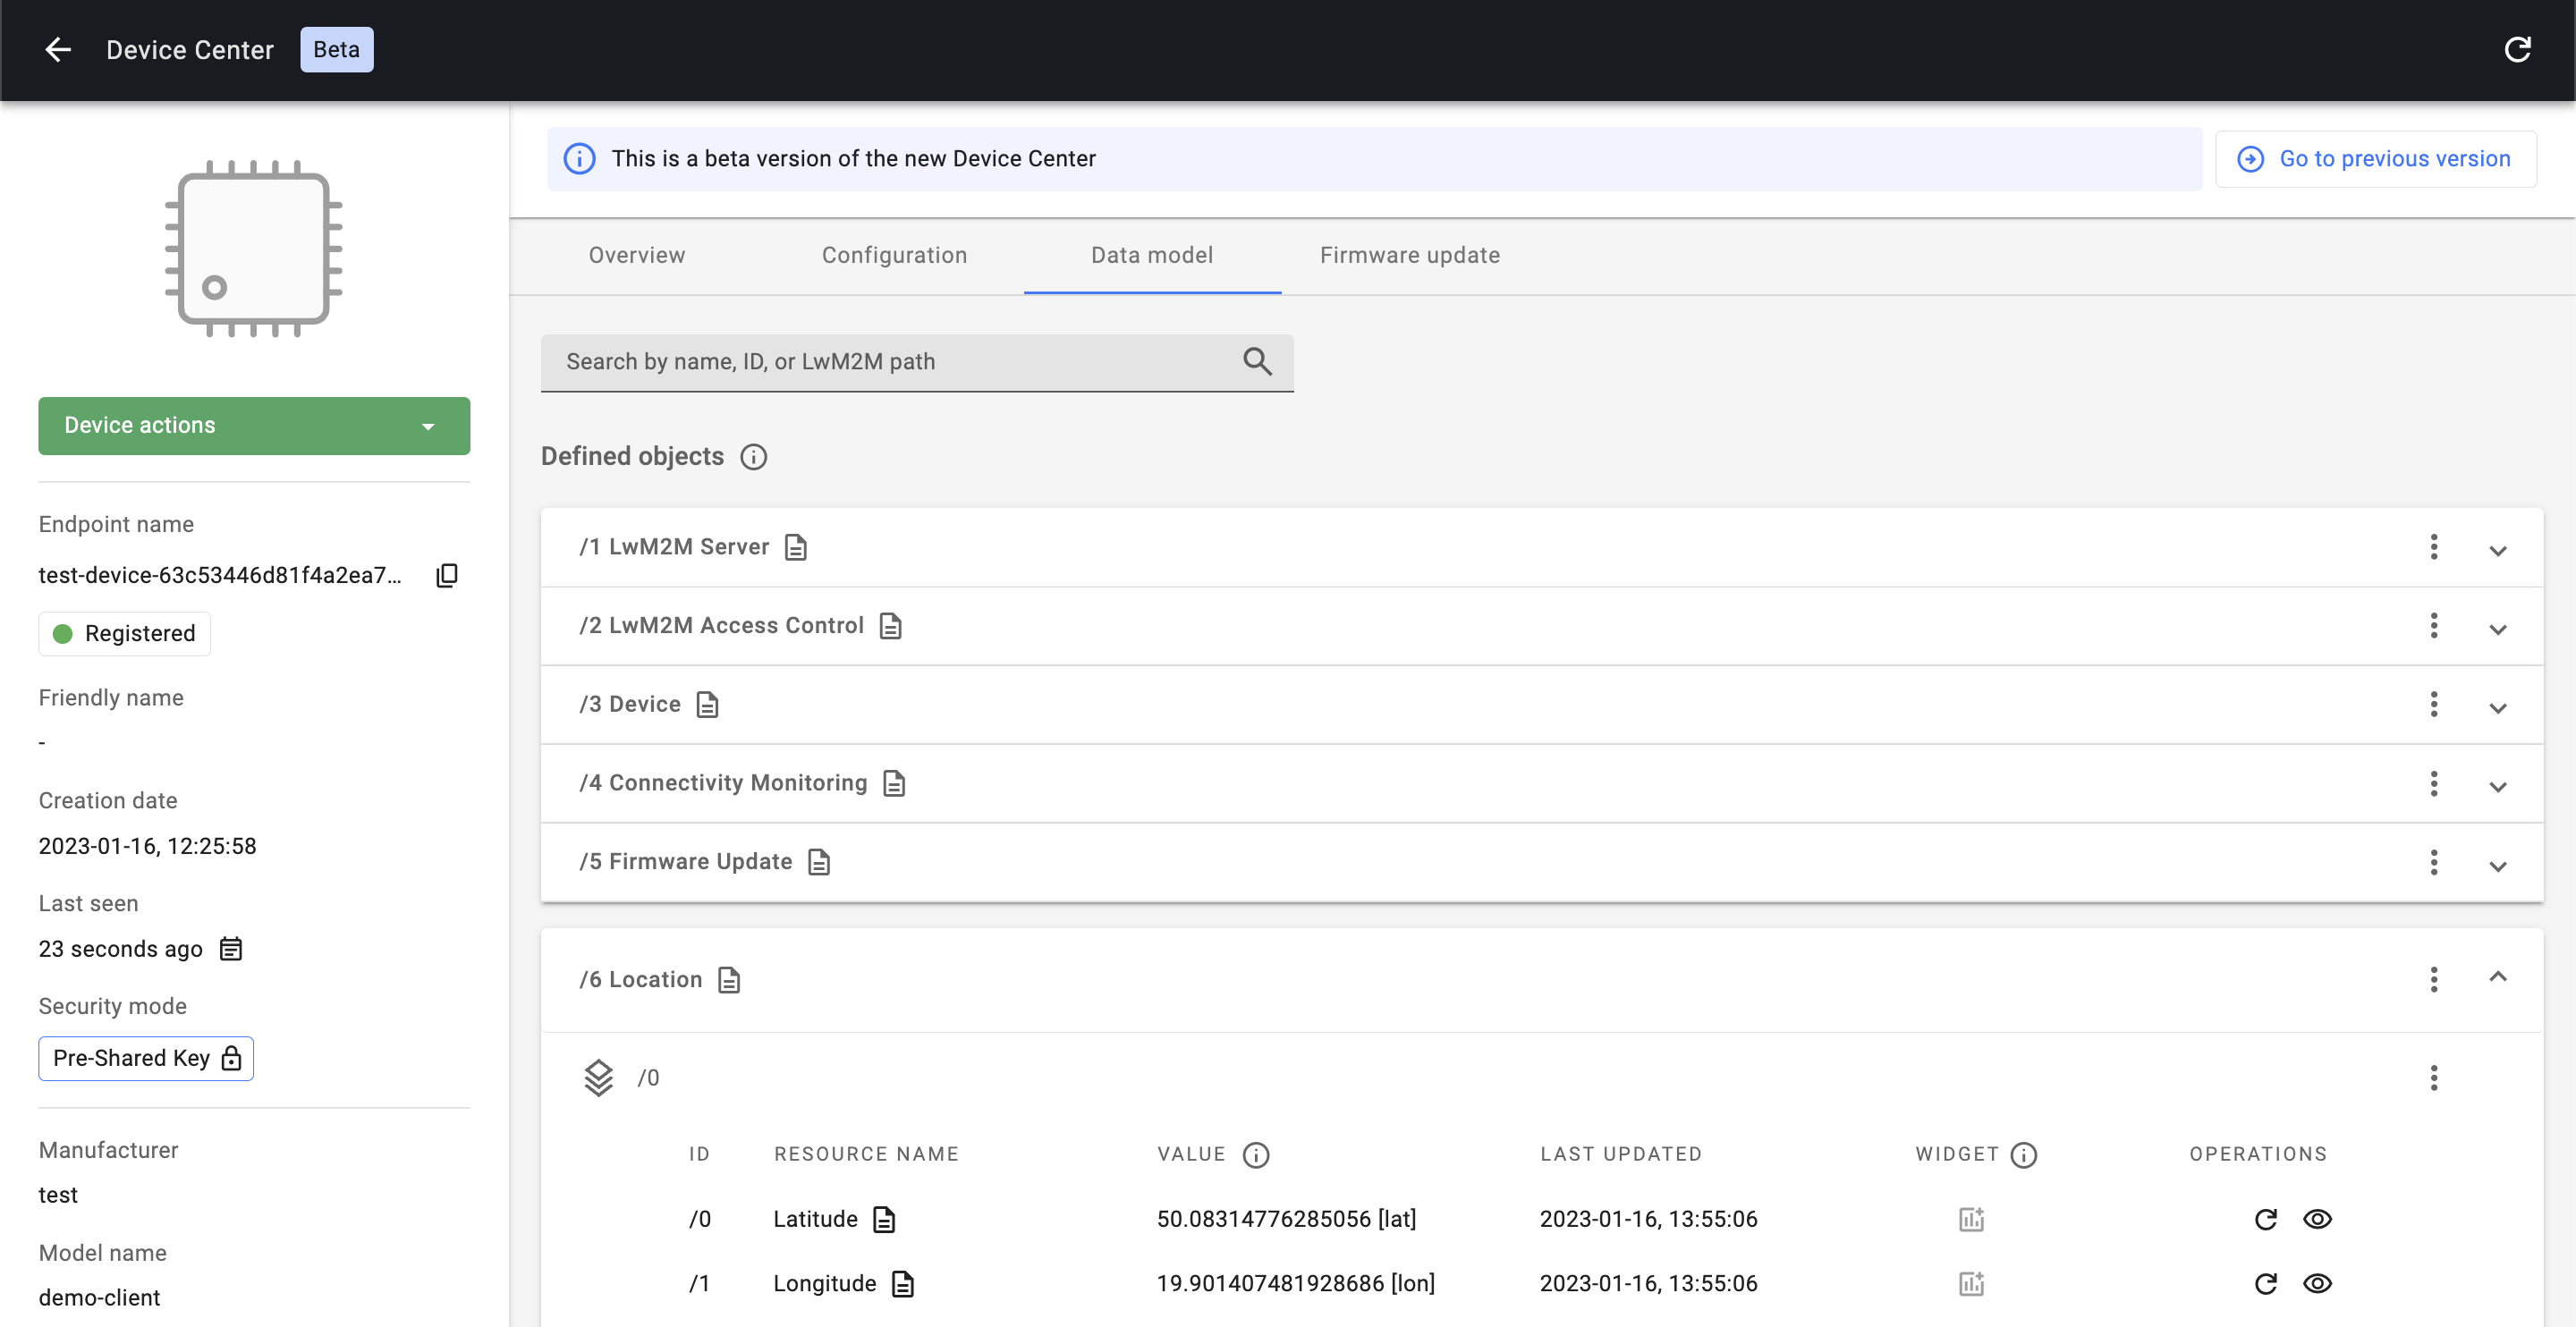
Review the Data model#
Go to the Data model tab in the top-menu.

Under Data model you will find all the configured LwM2M Objects, Object instances and Resources containing property values or telemetry data. This includes:
- Object
/1 LwM2M- Resource
/0 Short Server ID - Resource
/1 Lifetime - Etc.
- Resource
- Object
/3 Device- Resource
/0 Manufacturer - Resource
/1 Modem Number - Resource
/2 Serial Number - Etc.
- Resource
- Object
/6 Location- Resource
/0 Latitude - Resource
/1 Longitude - Resource
/2 Altitude - Etc.
- Resource
- Object
/3303 Temperature- Resource
/5601 Min Measured Value - Resource
/5602 Max Measured Value - Resource
/5700 Sensor Value - Etc.
- Resource
Next steps#
Did you manage to run the Anjay LwM2M Client Demo? Well done! 👏
Now the fun begins. Below you can find useful links to continue your LwM2M journey.
Get started with popular hardware platforms#
Follow the Getting started guides to kickstart your LwM2M application using one of the popular hardware platforms: Nordic, STMicroelectronics, ESPRESSIF or Raspberry Pi.


Learn more about Coiote IoT DM#
Dive into Coiote IoT Device Management platform and explore its numerous functionalities. From device onboarding using the Bootstrap Server to Data Visualization and running automated Device Tests.
Join our community on Discord#
Join us on Discord to get in touch with AVSystem experts and to meet fellow LwM2M developers.