LoRaWAN Gateway#
Overview#
A LoRaWAN Gateway is router equipped with a LoRa concentrator that functions as a communication device between end devices and a LoRaWAN Network Server (LNS) within a LoRaWAN network.
A LoRaWAN network is a low-power, wide-area network (LPWAN) designed for connecting devices over long distances with low power consumption. This network is perfect for IoT sensor networks and asset-tracking applications.
Once a gateway receives data from an end-device, it forwards it to the LNS which processes and delivers the data to the appropriate application server.
Prerequisites#
- You need an active The Things Stack Cloud account. For more information, see The Things Stack Cloud documentation.
Integration with LoRaWAN Network Server#
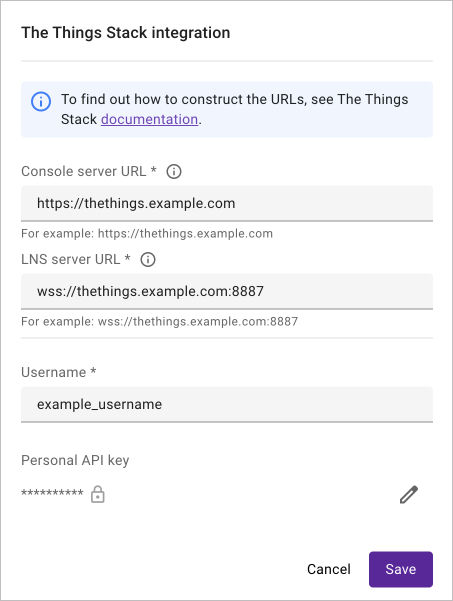
To connect LoRaWAN Gateway devices with Coiote IoT DM, you need to set up integration with a LoRaWAN Network Server. Coiote IoT DM supports one of the LoRaWAN Network Servers - The Things Stack. To set up the integration:
- Go to Integration > LoRaWAN Gateways.
- Click Connect in The Things Stack card.
- Provide the required data and click Save.
Important
The integration data is not validated when setting the configuration. It will be validated once you add the first LoRaWAN device. If the validation results in an error when adding the first LoRaWAN Gateway device, return to the integration panel and correct the configuration.
Adding LoRaWAN Gateway devices#
To add a LoRaWAN Gateway:
- Go to Device Inventory.
- Click Add device and then Add device manually under LORAWAN GATEWAY DEVICES.
-
Select connection via the Bootstrap Server or via the Management Server.
Info
Connecting devices via the Bootstrap Server is unavailable in the Developer plan.
-
Follow the steps in the device creator.
Adding a LoRaWAN Gateway via the Management Server consists of two steps:
- Step 1: Configure your device connection
- Step 2: Connect your device
Adding a LoRaWAN Gateway via the Bootstrap Server consists of three steps:
- Step 1: Configure your device connection
- Step 2: Configure server connection
- Step 3: Connect your device
Below you can find the description of each step.
Configure your device connection#
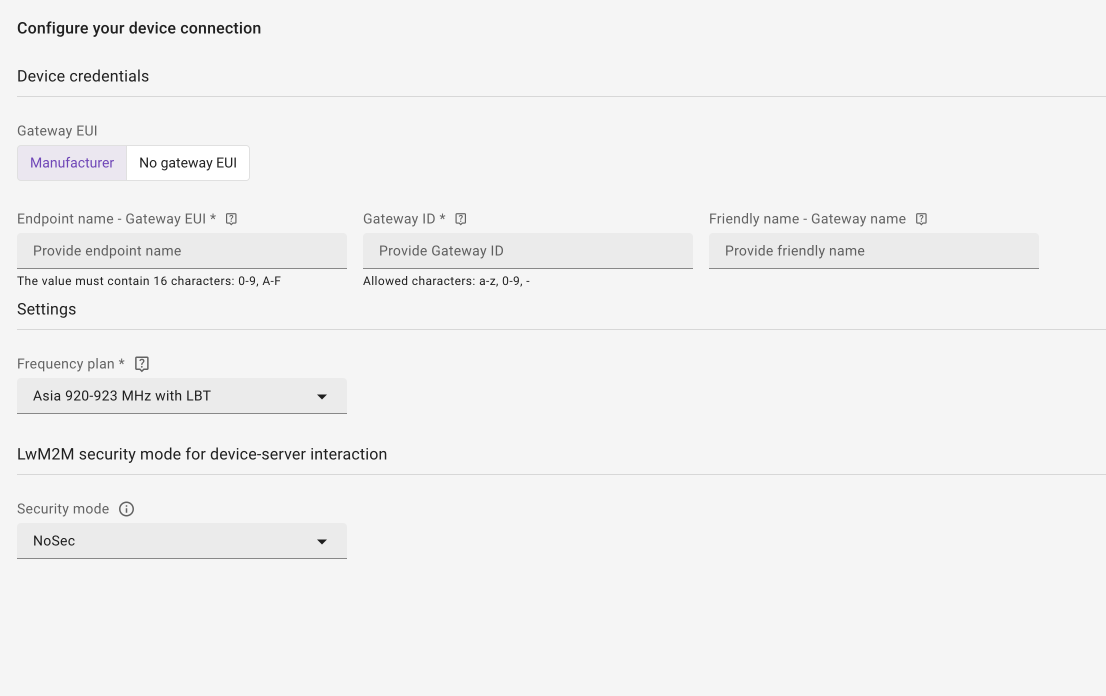
In this step provide the information about the LoRaWAN Gateway device and choose device connection settings.
In the section Device credentials, provide the following information:
- Gateway EUI - choose one of two options:
- Manufacturer - select this option, if you have a gateway from a manufacturer with a Gateway EUI. The following field is available for this option:
- Endpoint name - Gateway EUI: A 64-bit extended unique identifier for your gateway. It should be provided by the manufacturer or printed on the gateway packaging. It will become the endpoint name by which the Coiote IoT DM server will identify the device.
- No gateway EUI - select this option if your gateway doesn't have a Gateway EUI. The following field is available for this option:
- Endpoint name: Provide an endpoint name by which the Coiote IoT DM server will identify your device.
- Manufacturer - select this option, if you have a gateway from a manufacturer with a Gateway EUI. The following field is available for this option:
- Gateway ID: Unique identifier for your gateway that will be used by The Things Stack to identify your device.
- Friendly name - Gateway name: An optional human-readable name to help you identify your gateway. The Things Stack will use this name instead of the gateway ID to refer to your gateway.
In the section Settings, select your frequency plan. The frequency plan defines channels, data rates and radio configuration that your end device or gateway is set up to use. The gateway and end devices within reach must use the same frequency plan to communicate.
In the section LwM2M security mode for device-server interaction select the security mode:
- Pre-shared key - authorize your device using a pre-shared key. To use this option, provide the following:
- Key identity - define the name that the device will use during the DTLS handshake. It should be equal to the LwM2M device endpoint name.
- Key format.
- Key - provide the shared secret used in the device-server authentication.
- NoSec - use the device with no security established for the device-server communication. Use this mode only for testing purposes.
- Certificate - secure your device-server communication with a certificate:
- Select Use a previously uploaded certificate if you have already uploaded a certificate to the platform using the DTLS/TLS Certificates panel.
- Select Upload a new certificate to load your certificate by clicking Browse.
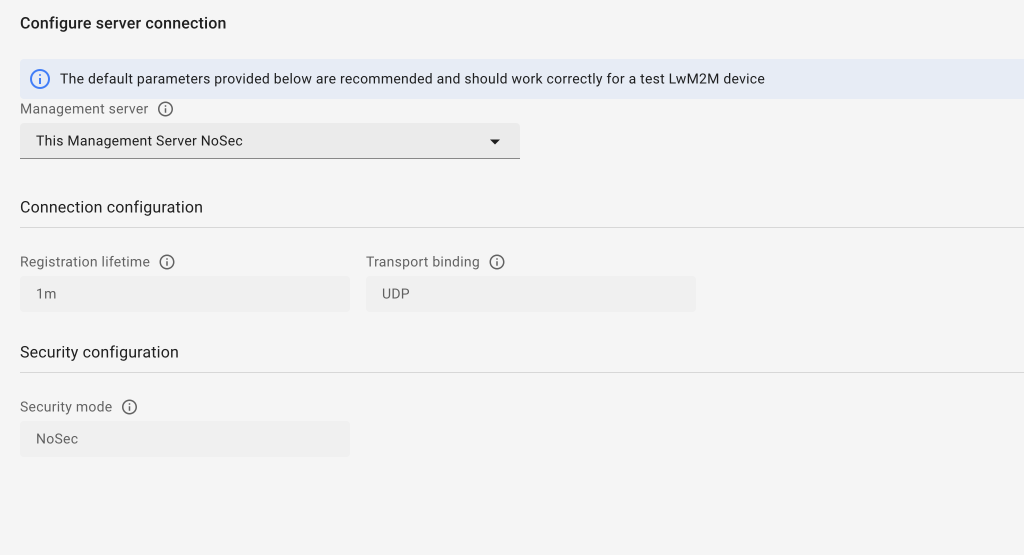
Configure server connection#
This step is only for the connection via the Bootstrap Server.
Provide new bootstrap connection settings. You can choose from the options in the drop-down list:
- Use the bootstrap configuration set as default for your domain - use this setting if you want to employ the inherited bootstrap settings for your domain.
- This Coiote IoT DM Management Server (Cert with EST) - use this setting if you have chosen the Certificate mode in the Device credentials step.
- This Coiote IoT DM Management Server NoSec - use this setting to establish the device-server communication with no security. Using this mode is not recommended except for testing purposes.
- This Coiote IoT DM Management Server PSK - use this setting to authorize the device-server communication using a pre-shared key.
- Your custom bootstrap setting - this option is available if you configured a bootstrap server setting using the Bootstrap configuration panel.
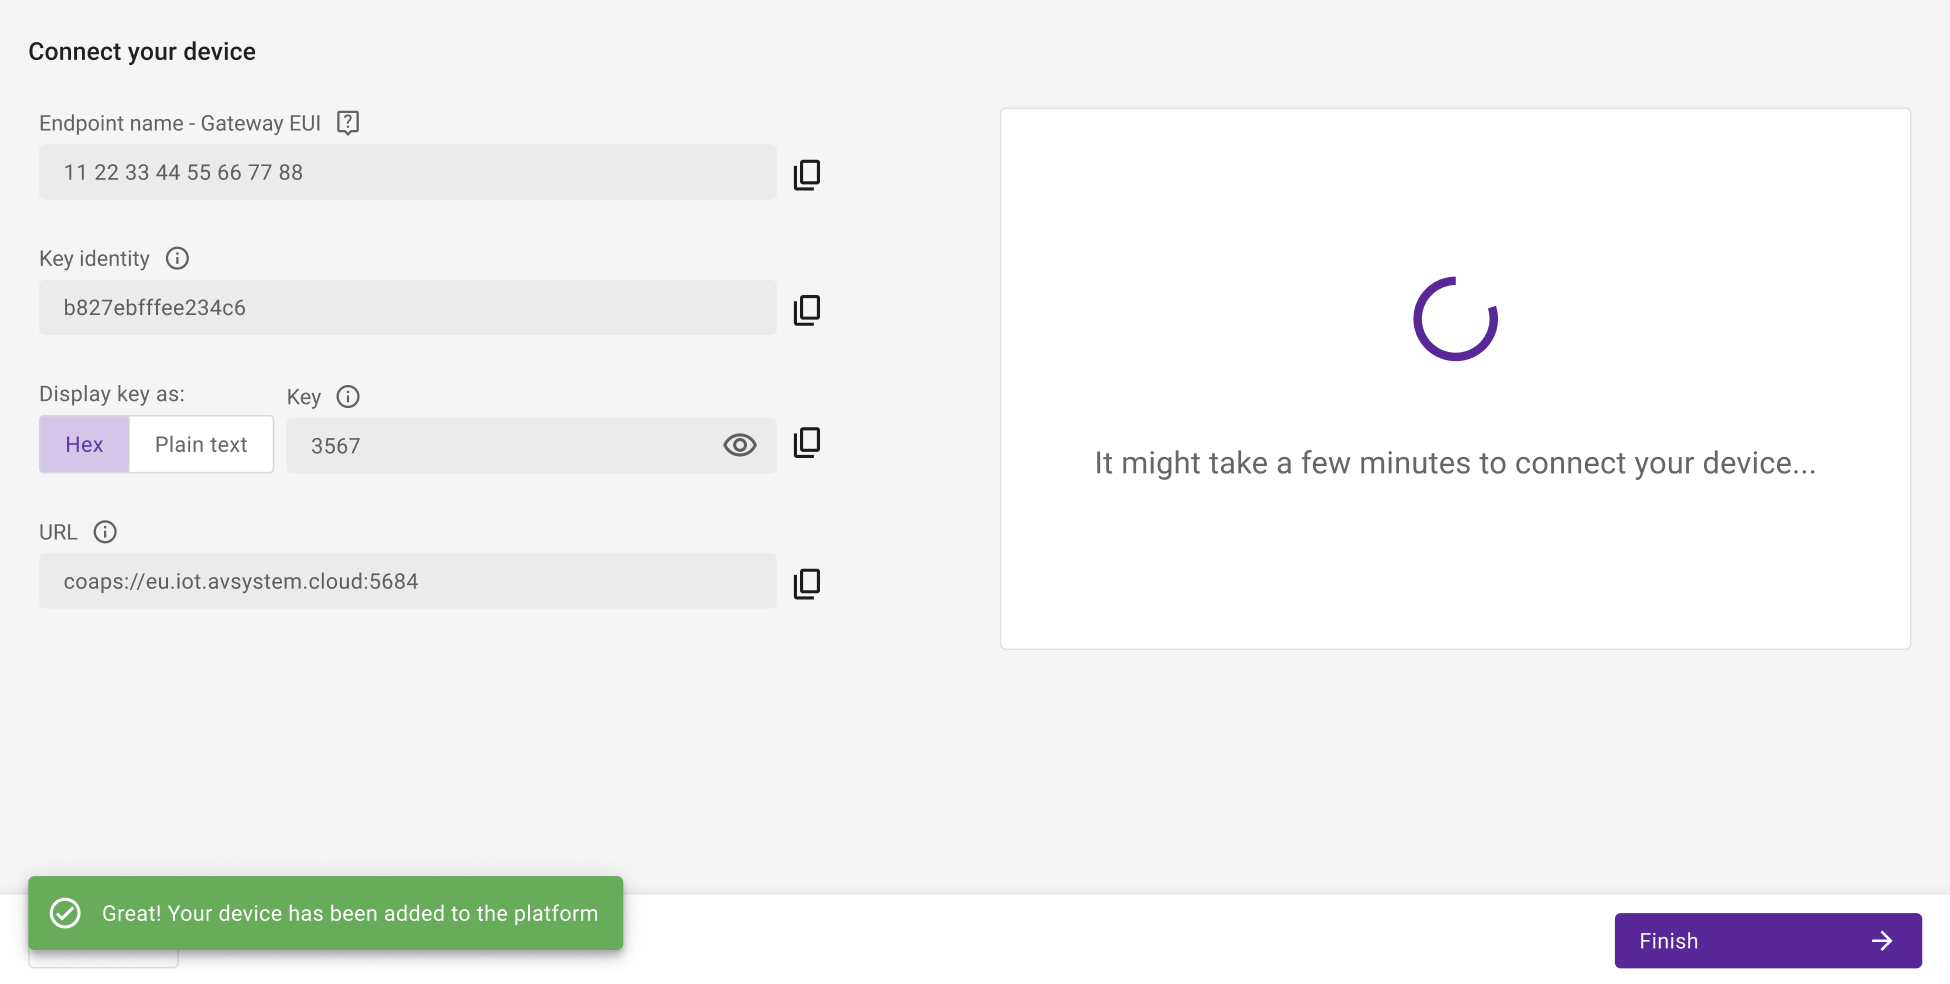
Connect your device (optional)#
In the last step, you can connect your device by inserting the displayed parameters into your device. It's an optional step. You can finish the configuration and connect the device later.