Set an Observation#
This section describes how to set an Observation in your Azure IoT Hub.
Setting an Observation lets your devices know what value changes and for what particular resources they need to notify you about. An Observation can be set for any or all the components of the data model: objects, objects instances, and resources. Whenever there is a change in values, a device will send a Notify message to Coiote IoT DM, which in turn will transfer it to Azure IoT Hub.
In this section, you learn how to:
- Set an Observation on objects and resources
- Define Observation attributes
- See value changes for the observed objects and resources
Prerequisites#
- An active Azure IoT Hub with hub owner access permissions.
- A Coiote IoT DM user account with permissions to use the integration extension.
- A device group created in Coiote IoT DM.
- A configured extension between Coiote IoT DM and Azure Iot Hub.
- A configured integration template in Coiote IoT DM, assigned to the device group.
- A connected device.
Set an Observation and define its attributes#
Let’s set two Observations: one on the whole object with ID 1/1 (1 LwM2M Server, 1 Lifetime) and on the resource with ID 3/0/13 (3 Device, 13 Current time). Both of them are Properties.
In Azure IoT Hub, value changes for both Telemetry and Property are stored in Device twin, because Observation is a Property in itself and it does not keep track of historical changes in values. To set an Observation, do the following:
-
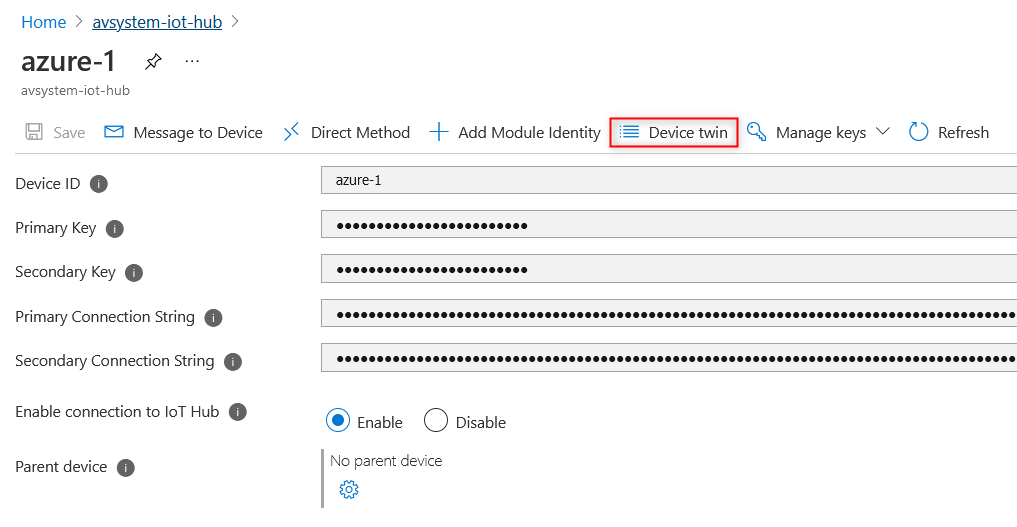
In your Azure IoT Hub account, go to Devices from the left pane.
-
Click on the device and then go to Device twin.

-
Find the desired property in the JSON snippet. This is where you define what needs to be observed.
-
To set an Observation on object 1/1 (Lifetime) and resource 3/0/13 (Current time), add the following fragment under the
"desired": {property:
            "lwm2m": {
                "1": {
                    "1": {
                        "observed": true,
                        "attributes": {
                            "pmin": 60
                        }
                    }
                },
                "3": {
                    "0": {
                        "13": {
                            "observed": true,
                            "attributes": {
                                "pmin": 1
                            }
                        }
                    }
                }
            },
The line with “observed”: true sets an Observation. The line with “attributes” specifies the conditions under which notifications will be sent: “pmin”: 1 means that notifications will be sent every second.
Info
- pmin - the minimum time in seconds between two notifications.
- pmax - the maximum time in seconds between two notifications. The notification is sent even if the value didn't change.
Read more about other attributes in our Brief description of OMA LwM2M.
Click Save.
See value changes#
In Azure IoT Hub#
The value changes for the observed object and resource are displayed in the same JSON snippet where you set an Observation. Scroll down to the Reported property and find the value line.
 "13": {
                            "value": 1634653218000,
                            "attributes": {
                                "pmin": "1"
                            },
                            "observed": true
                        }
pmax: 1), the number next to value will be changing every 1 second. E.g., 1634653218000 will become 1634653219000.
If you don’t see any changes, click Refresh. If it doesn’t help, you can check whether observation has been set in Coiote IoT DM as well.
In Coiote IoT DM#
This step is optional. If you want to make sure the Observation has been correctly set in Coiote IoT DM, do the following:
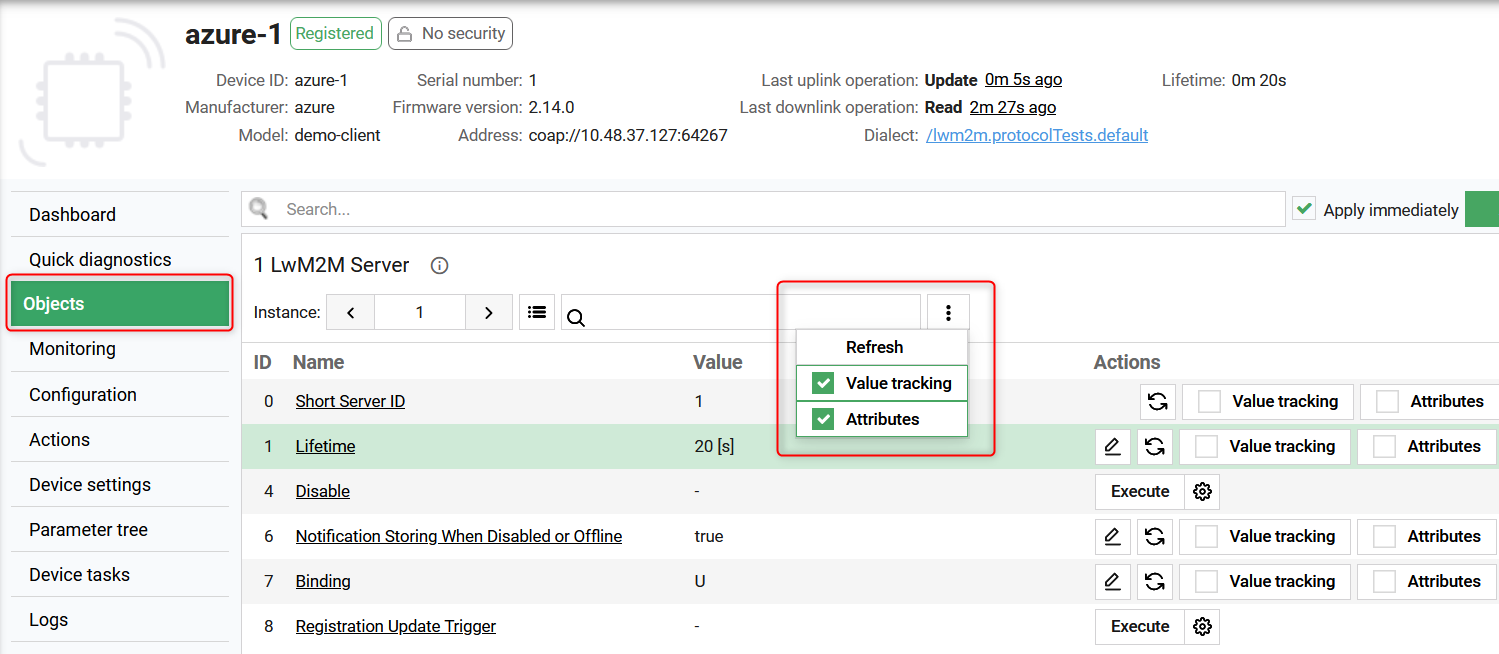
- In Coiote IoT DM, go to Device inventory --> Objects.
-
For the Observation set on the whole object (1/1), click the vertical Ellipse button next the search field and then click Refresh. If the Observation has been set correctly, the checkboxes will be filled in green.

-
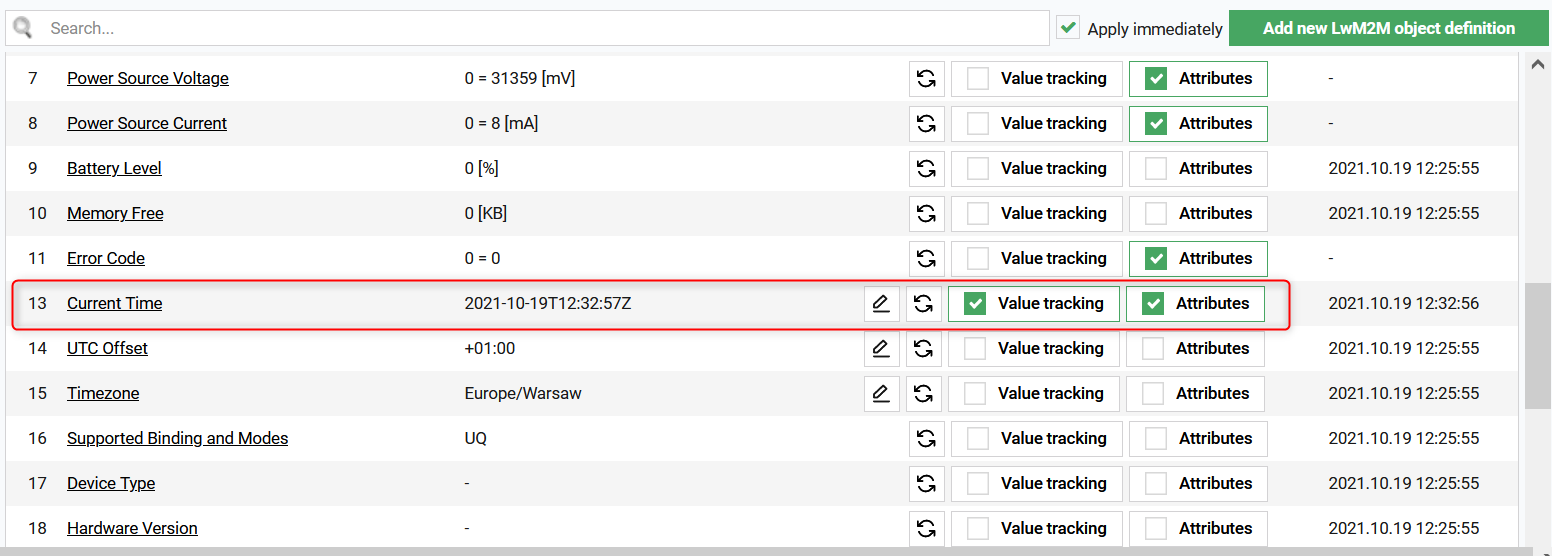
For the Observation set on the specific resource (3/0/13), find this resource in the list and click the Refresh button to the left from the Value tracking. You will see that checkboxes next to Value tracking and Attributes are now filled in green.

-
Click Value tracking. You will see
pminset to 1, which is the same as you defined in the JSON in Azure IoT Hub.
You have successfully set an Observation on LwM2M object and resource. To add another Observation, add the lines in the same JSON snippet, as described in Step 4.
Delete an Observation#
To stop observing an object or resource, do the following:
- In Azure IoT Hub, click on the device and then go to Device twin.
-
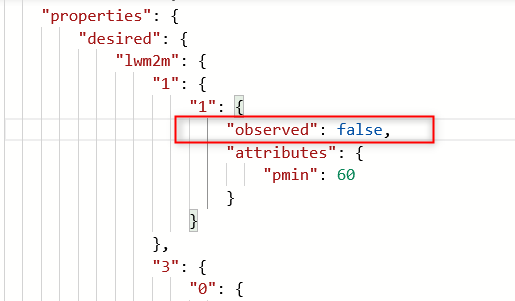
In the JSON snippet, change
"observed"fromtruetofalse.
-
In Coiote IoT DM, you can now go to Device inventory --> Objects and see how Value tracking and Attributes boxes are now unchecked.
Next steps#
Air quality monitoring - tutorial