Datacake#
You can easily integrate with Datacake using webhooks and a custom payload decoder. See the Datacake docs covering this type of integrations.
Prerequisites#
- A user with access to the Coiote IoT Device Management platform and appropriate permissions
- A LwM2M device
- A Datacake account (you can create a free Datacake account)
Setup Datacake#
- Open your Datacake account.
- Create a new workspace or select an existing one.
- Create a new API Device representing your device by going to: Devices > Add device.

- Select or create a Product that will be used as a template for your device. Products aggregate devices sharing similar configurations, you will later use an endpoint dedicated to your Product to ingest data for your device.

- Create a dedicated product for the demo device to use in this tutorial.
- Name your device and enter its endpoint name as the device serial number.

- Pick a plan for billing your integration and complete the process. You can add up to 5 devices in the free plan of your workspace.

Configure fields for your device#
- From the devices list, select the device and open its details by clicking on its name.
- To configure the data model of your device, in the Configuration tab, find the Fields of the device and add new field representing the temperature measured by your device. You can add fields of different types as Datacake field types cover all LwM2M resource types.

- For the temperature measurements, pick the Float type and name it
TEMPERATURE.
Configure payload decoder#
Follow to the HTTP Payload Decoder section to configure the decoder for JSON values that will arrive from Coiote IoT DM. To parse the incoming Webhook data from Coiote IoT DM, you will need a decoder similar to the following one:
function Decoder(request) {

    // Parse JSON into Object
    var payload = JSON.parse(request.body);

    var endpointName = payload.endpointName;
    var temperatureUrl = "/3303/0/5700";
    if (payload.url == temperatureUrl) {
        var temperature = parseFloat(payload.value);
        var time = payload.timestamp;
        return [{
            device: endpointName,
            field: "TEMPERATURE",
            value: temperature,
            timestamp: time / 1000
        }];
    } else {
        return [];
    }
}
This decoder does several things required to ingest device data into the Datacake database:
- it selects the
endpointNamefield used for identification of the device in the platform, - it accepts only changes from LwM2M URL
/3303/0/5700which represents the Temperature/Sensor value resource, - it parses the value and timestamp from the payload of the event.
Save the configuration and copy the HTTP Endpoint URL, which will be used as webhook target for Coiote IoT DM event handler.
Create webhook in Coiote IoT Device Management platform#
- Go back to your domain in Coiote IoT Device Management platform.
- Go to Integrations > Data Integration Center and create a Webhook event handler that will forward device telemetry.

Configure Datacake webhook parameters#
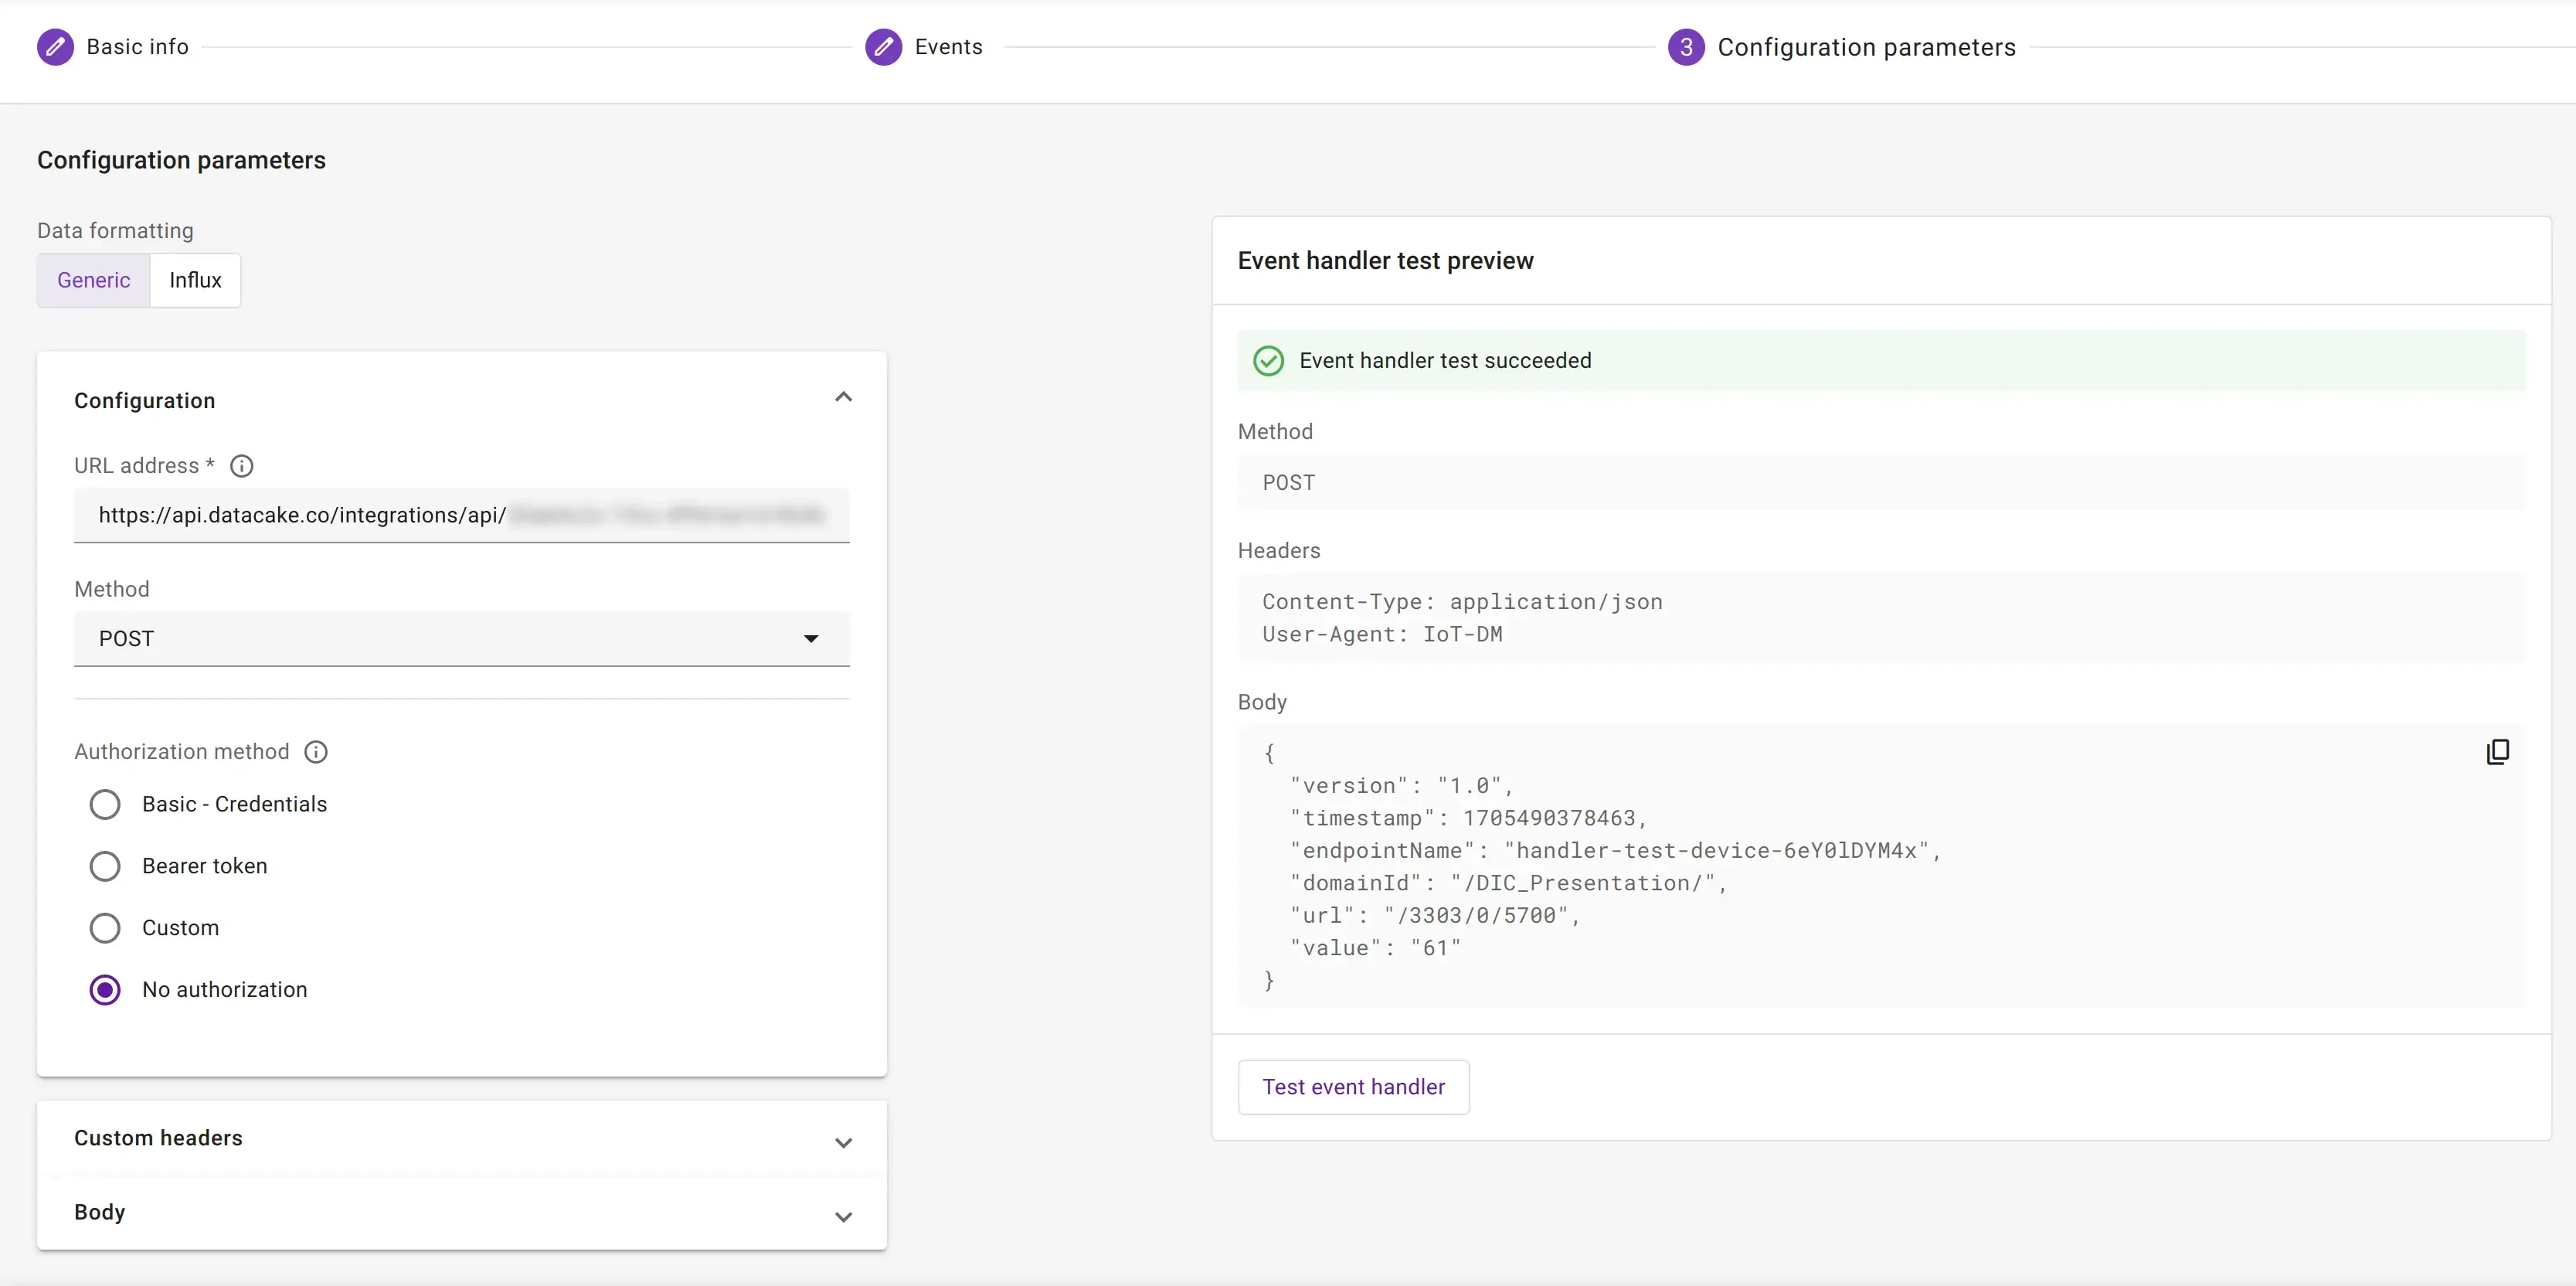
- Apply the filter and go to the connection configuration step to configure the fields as follows:
- set the formatting to
Generic, - set the URL to the
HTTP Endpoint URLyou copied before from the Datacake configuration view. It should look like this:https://api.datacake.co/integrations/api/aaaaaaaa-bbbb-cccc-dddd-eeeeffffggg/, - set the Authorization to
No authorization, as Datacake treats the endpoint URL as a token itself.
- set the formatting to
- To confirm that you entered your data correctly, test the event handler.
- To create the event handler, click Next step and Add event handler.
Monitor events in Datacake#
After activating the event handler, go to your Datacake account and open the Dashboard of your device. If you have already set an observation on the Temperature object, you should see that the Last update field of your device in Datacake changed to the time when Datacake received last information from Coiote IoT DM.

Let's set up a Datacake dashboard to display the received Temperature data.
Create widget in Datacake#
-
Enter the edit mode by clicking the toggle on the right side of the dashboard.
-
Click Add Widget and pick Chart type.

-
In the configuration view, go to Data tab and select the previously created
TEMPERATUREfield as the source of data for your chart.
-
To see better the incoming data, go to Timeframe tab and select Custom.

-
Change the Resolution to
1 minute. -
Save the chart and resize it on the dashboard according to your taste. You can read more about Datacake's device dashboards in their docs.
