Configure tests#
Introduction#
This chapter covers the configuration aspects of the device tests. It explains how to list and view the configuration of tests, and how to add, edit, delete, import, and export them.
Note
The configuration of tests is device-independent, which means that all the configured tests can be applied for all the devices that have registered to the platform.
Device test repository panel#
In this section you'll learn about the layout and main features of the Device test repository panel.
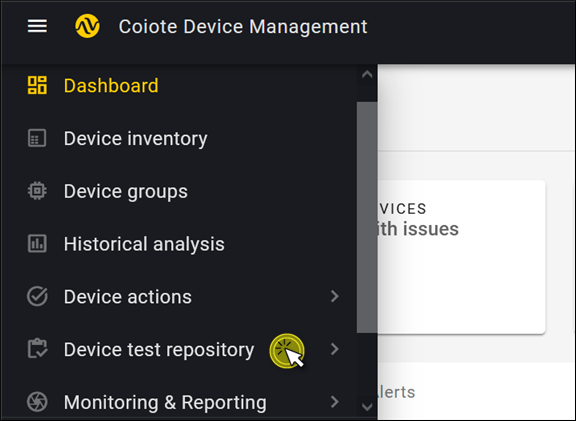
To enter the panel, select Device test repository and then Server simulator in the navigation menu.

- Search – use it to search the test list.
- Filter - use it to filter tests either per domain or per test type (Automated or Semi-Manual).
- Add test – use it to add a test manually or import tests from a
.conffile. - 'Select all' checkbox – use it to select or deselect all tests visible in the list.
-
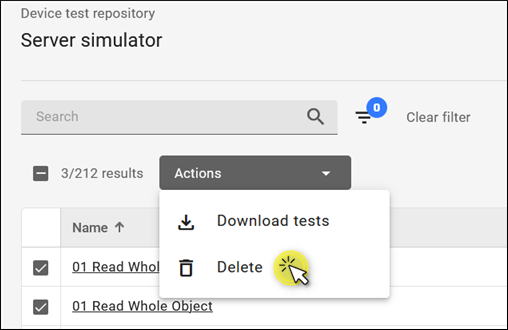
Actions – drop-down menu – use it to download or delete selected tests.

-
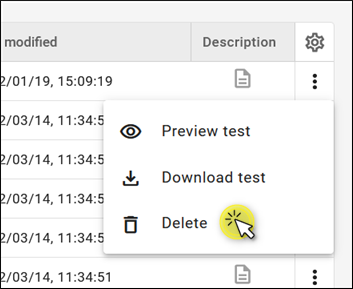
Actions – context menu - use it to preview, download, or delete selected tests.
- Test list – it features all the tests available for you at the moment, or all the tests meeting the search criteria (if entered).
- Test type – it shows the test type: either Automated or Semi-Manual.
- Domain name – it shows the names of domains and subdomains to which your test belong.
- Creation date – it shows the date when the test was created.
- Last modified – it shows the date when the test was last modified.
- Description – it shows a test description, if the test has any.
Listing tests#
The tests appearing in the Device test repository panel are presented in the form of a searchable alphabetical list to ensure their convenient viewing and management. Read on this section to learn how to use the search to list your tests.
Using the search#
To search the list of configured tests, start typing your entry into the search field. The matching items will appear in the list.
Tip
Note that if you select a test from the filtered list and then erase your entry from the search field, the selection is carried over to the complete list view. Similarly, if you use the Select all checkbox in the full list view and then filter the list using the search, the selection is carried over to the filtered list view.
Viewing test configuration#
Read this section to learn how to view the configuration of an individual test:
- From the navigation menu, select Device test repository.
- In the list, find the test you want to view and click its name.

- In the action list, expand the action items by clicking the ˅ icon.
- To expand or collapse the complete action list, use the Expand all and Collapse all buttons.
- Optionally, you can use the Edit test button to edit your test or click the trash bin icon to delete it.
Adding new tests#
Read this section to learn how to add a new test. You can either add a test manually or import tests as a .conf file.
Add a test manually#
- From the navigation menu, select Device test repository.
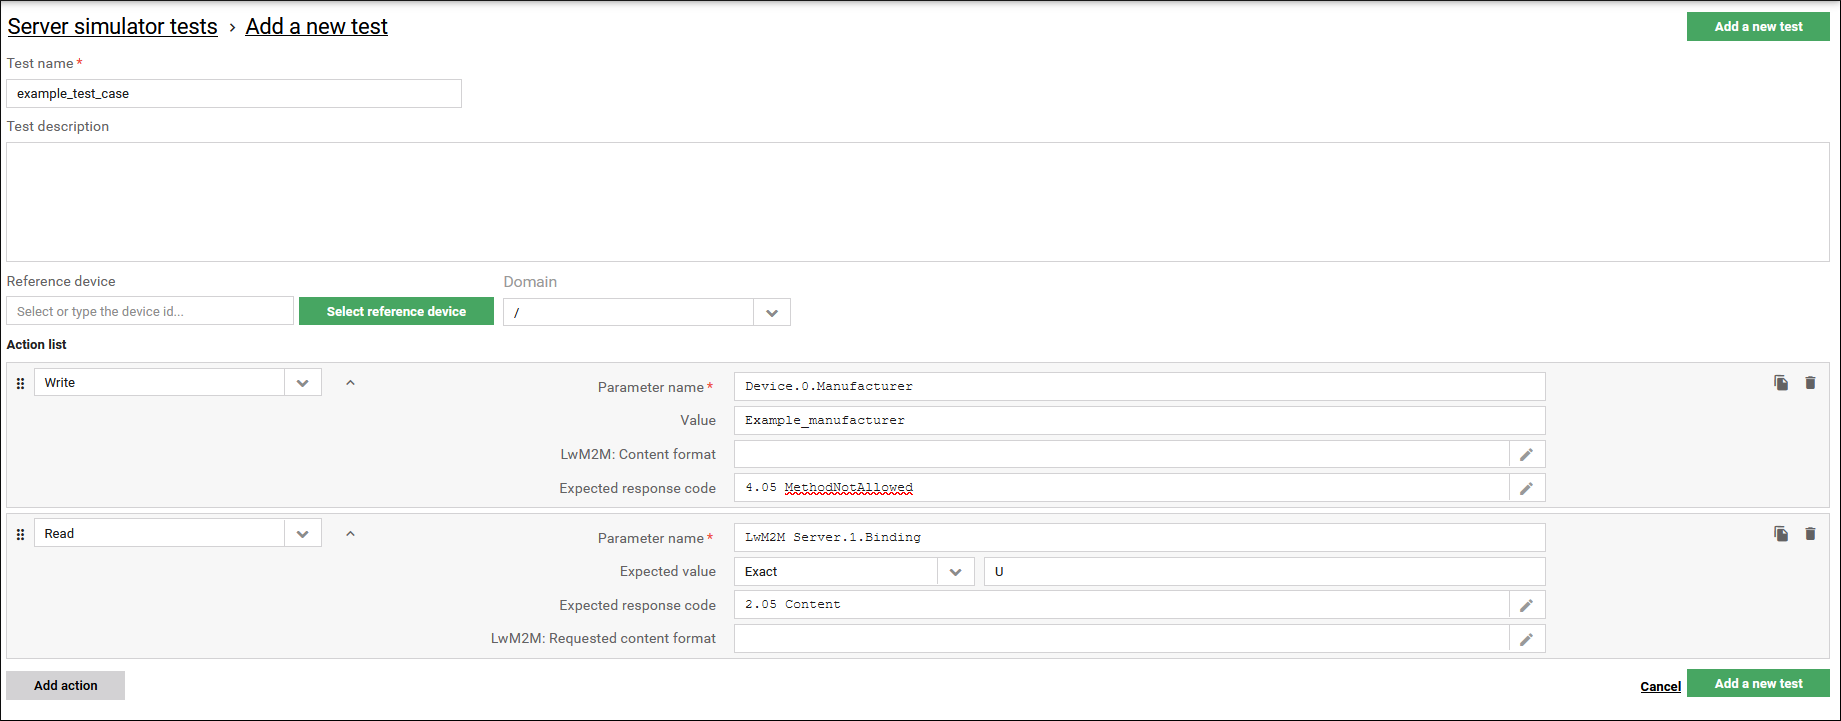
- Click Add test and select Add test manually
- Configure your test:

- Enter your Test name (this field is mandatory).
- Enter your Test description (this field is optional).
- Select your Reference device (this field is optional). You can either:
- type the exact device ID in the Reference device search field and hit
Enter, - click Select reference device and select your device from the list. If you can't see your device in the list, start typing its name in the search field to get matching results.
- type the exact device ID in the Reference device search field and hit
- In the Action list, specify your actions:
- To add your first action item, choose its name from the drop-down list, or type its name in the Specify action field.
- Within the action, fill in the mandatory attributes field.
- To add another action item, use the Add action button and specify your next action.
- To change the order of actions within the test, drag and drop the action item you want to move by using the drag icon.
- To copy an action item, click the copy icon (except for the Loop action).
- To delete an action item, click the trash bin icon.
- If your test is ready and all the mandatory fields are filled, click Add a new test.
Note
To learn more about individual test actions, see the Test action chapter.
Import tests from .conf file#
- From the navigation menu, select Device test repository.
- Click Add test and select Import tests from .conf file.
- A dialogue box prompting you to import a
.conffile appears. Add the file and click Import.
Tip
To download tests into a .conf file, check the Downloading tests section.
Editing tests#
Read this section to learn how to edit a test.
Note
If you edit a test that was executed before, the existing historical results for this test will no longer be available.
- From the navigation menu, select Device test repository.
- From the list, choose the test you want to edit and click its name.
- Click Edit test in the top-right corner.
- Edit your test:
- Modify your Test name (this field is mandatory).
- Modify your Test description (this field is optional).
- Change or add your Reference device (this field is optional). You can either:
- type the exact device ID in the Reference device search field and hit
Enter, - click Select reference device and select your device from the list. If you can't see your device in the list, start typing its name in the search field to get matching results.
- type the exact device ID in the Reference device search field and hit
- In the Action list, edit your actions:
- Edit an existing action item by changing its name, modifying its attributes.
- Add another action item using the Add action button.
- Change the order of actions within the test by dragging and dropping the action item you want to move using the drag icon.
- Copy an action item by clicking on the copy icon (except for the Loop action).
- Delete an action item by clicking on the trash bin icon.
- If you are done editing your test and all the mandatory fields remain filled, click Save changes.

Deleting tests#
Read this section to learn how to delete tests.
- From the navigation menu, select Device test repository.
- From the list, select the tests you want to delete.
-
There are two ways to delete the selected tests:
- Click the Actions drop-down menu and select Delete.

- Click the context menu on the right and select Delete.

- Click the Actions drop-down menu and select Delete.
-
In the dialog that appears, click Delete. The test will be permanently deleted and you won't be able to recover it.
Downloading tests#
Read this section to learn how to export tests.
- From the navigation menu, select Device test repository.
- From the list, select the test(s) you want to export.
- There are two ways to download the selected tests:
- for batch export, click the Actions drop-down menu and select Download tests.
- for single test export, click the context menu on the right the test entry and select Download test.
- The tests are downloaded in the
.confformat.
Tip
Edit the exported tests using Windows Notepad or other standard text editor.
Previewing test#
- Select the test you want to preview.
- Click the context menu on the right and select Preview test.